Some customer wants to keep track on how certain software are licensed, and one way to do that will be described here.
We will extend the Software item class with a list property, populate that list with some values and create a view based upon that licensing information.
- Start your Authoring tool and create a new Management Pack (MP). I’ll name my MP ExtensionOfSoftwareItem.xml
- Locate the Class Browser and search for Software Items (If the list is empty, hit the refresh/reload content button first). Right click the Software Items class and choose View.
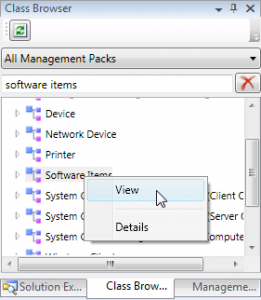
- The sealed MP in which the original Software items class is stored will be loaded in the authoring tool. Next we will have to right click the Software Items class and select Extend class.
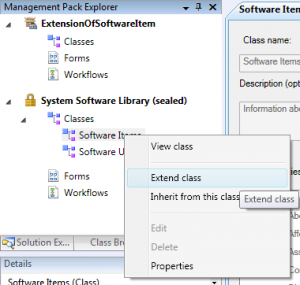
- A dialogue asking in which MP we want to store our customizations will appear. Press Ok to save it in the MP we just created.
- Now we have came to the step where we do the actual extension, so let’s hit the Create Property button.
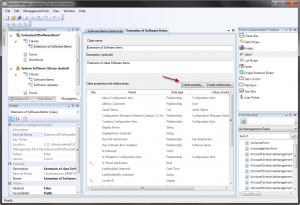
- Enter a good name for our new property and press Create. I’ll name mine SoftwareLicense.
- The new property which we just added will be of the default Data Type string. What we would like to do, is creating a list of different licensing models, and in order to do that, we need to change the Data Type to List. So press the dropdown meny labeled Data Type in the Details window and select list. (You might need to press the enter key after you’ve selected List)
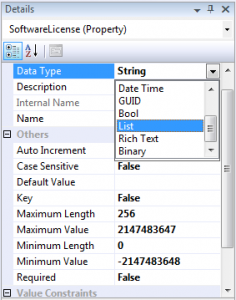
- A new dialogue box will appear in which all existing lists will be presented. But since our list doesn’t exist, we need to create a new one. So press the Create List… button.
- Enter a Internal name, a display name and a description and press Create followed by Ok.
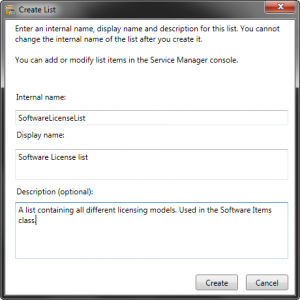
- That’s actually all we need to do in the Authoring Tool. If the Software items class would have it’s own form, we could have edited that form to place our new list where we wanted it, but since it’s based upon the generic form, we won’t need to do that. So let’s save our MP and import it into Service Manager. (To import the MP, go to Administration -> Management Packs in the SCSM console and use the import task on your right hand side)
- After the MP has been imported, our new list should appear under Library -> Lists. So let’s go there and add a few licensing models.
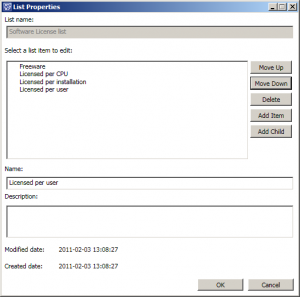
- Now let’s go to the All Software view in the Configuration Items wunderbar. Locate a software CI of your choice and open it. The form should now have additional field named Software License.
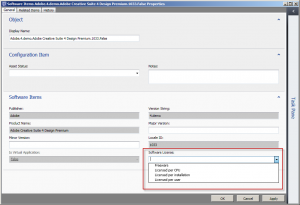
- So you are now able to assign a software license form for all your applications, great. But if you would like to see all your Software Items in a fast and easy way, we would need to create a view for that. So let’s do that as well.Right click on the folder on your left hand side named Software and select Create view, or click the task on your right hand side that is named the same.
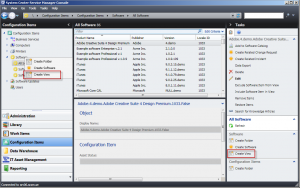
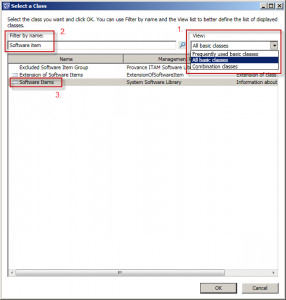
- Give the view an appropriate name and scroll down to the Criteria section. The default class here will be Configuration Item, so let’s change that to Software Items instead. Do that by pressing the Browse button. In this dialogue box, we will have to change the view to “All basic classes” first. Then we can do a search for Software Items. When you have located Software Items class, mark it and press ok.
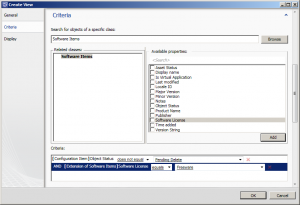
- Now we can select the criteria for this view. Leave the Object status does not equal Pending delete as it is, but mark Software Licens in the list and press Add. A new row should appear in the Criteria box below. Let’s edit that so it says Software License Equals Freeware.
- The last and final step of creating the view, is to select which information the view should display. In this example I’ll just choose Display Name, Software license and Time added. After you’ve selected which columns to display, press Ok.
- Your new view should now be created and should only view the Software items in which we have spcified the Software license as Freeware.

To sum up: We extended the Software Items class in the Autoring Tool with a property of the type list. We then added some items to this list and created a view based on on of those values. This is a pretty common task for anyone working with Service Manager, and with the help of the Authoring tool it is an easy thing to do.

4 Responses to Extend the Software Item class with licensing information