SCSM2012 Beta – One more “minor” important news

November 9, 2011 Posted by Stefan Allansson

Anders has wrote about two “minor” important news in SCSM2012 earlier and here is one more.

I will say this has been a pretty huge problem to many of us that doesn´t have english as the first language.
Okay, I prefer English in my console, some of my customers prefer English and some of them Swedish.
The problem in SCSM2010 is that you can´t choose language for the console, it gets the language that you have choosed for your operating system.

In SCSM2012 we now can choose from 20 other languages than English directly from the SCSM console!

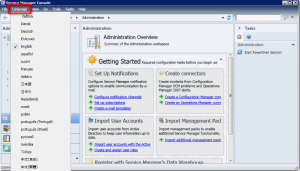
Here is a snapshot how it can look like in the English version:

Now we can easily change it in the menu under Language:

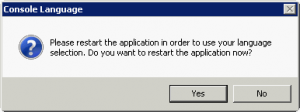
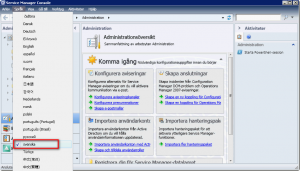
If I for example choose Swedish, I will get this windows that tells me to reboot the console to change the language:

After the reboot of the console we can see that it now has the Swedish language:

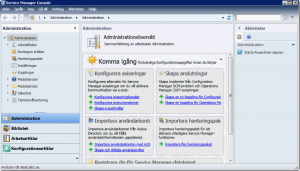
And this is how it looks like when the console is in Swedish.
I Understand that many of you don´t understand the swedish translation but hopefully you can find your own language in the list 🙂

SCSM2012 Beta – SSP doesn´t show the content

November 4, 2011 Posted by Stefan Allansson

One of the big news in the SCSM2012 Beta is the new Self-Service Portal with the Service Catalog.

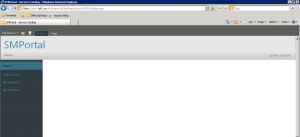
If you have installed it successfully, but can´t see anything when you click on the menus, maybe you have the same scenario that I had? This happens(or can happen) when you installs the SSP with a SSL certificate.

So if you have the same problem, it can look like this:

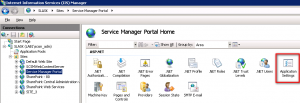
To solve it, open the IIS on the server where you installed the SSP.
Open Sites\Service Manager Portal and double click on Application Settings:

Double click on the Application Setting called SMPortal_WebContentServer_URL:

Under Value, change the server name to FQDN.

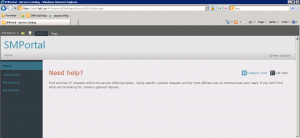
Go to your SSP again and refresh the site. Now you will hopefully see the content:

SCSM2012 Beta – Powershell improvements

October 29, 2011 Posted by Anders Asp

Even though Service Manager 2010 had some CMDlets for us to utilize, there weren’t much we could do with them. In fact, we had a total of 28 CMDlets and most of these is used to do maintenance tasks or behind the scene configuration. Let’s say there were plenty of CMDlets to wish for…

Well, guess what. Microsoft must’ve felt the same way, because in Service Manager 2012, we now have a totalt of 122 CMDlets! With the combination of these CMDlets and the SMLets, we can now do pretty much anything in Service Manager using powershell! (No, these new CMDlets does not replace SMLets in any way, we’re still going to have a use for those)

Here’s a list of all the CMDlets in SCSM 2012:

Add-SCSMAllowListClass
Export-SCManagementPack
Export-SCSMManagementPack
Get-SCClass
Get-SCClassInstance
Get-SCDiscovery
Get-SCGroup
Get-SCManagementGroupConnection
Get-SCManagementPack
Get-SCObjectTemplate
Get-SCRelationship
Get-SCRelationshipInstance
Get-SCRunAsAccount
Get-SCSMAllowList
Get-SCSMAnnouncement
Get-SCSMChannel
Get-SCSMClass
Get-SCSMClassInstance
Get-SCSMCommand
Get-SCSMConnector
Get-SCSMDCMWorkflow
Get-SCSMDeletedItem
Get-SCSMDiscovery
Get-SCSMEmailTemplate
Get-SCSMEmailTemplateContent
Get-SCSMGroup
Get-SCSMManagementGroupConnection
Get-SCSMManagementPack
Get-SCSMObjectTemplate
Get-SCSMPortalCMConfiguration
Get-SCSMPortalContactConfiguration
Get-SCSMPortalDeploymentProcess
Get-SCSMPortalSoftwarePackage
Get-SCSMQueue
Get-SCSMRelationship
Get-SCSMRelationshipInstance
Get-SCSMRunAsAccount
Get-SCSMSetting
Get-SCSMSubscription
Get-SCSMTask
Get-SCSMUser
Get-SCSMUserRole
Get-SCSMView
Get-SCSMWorkflow
Get-SCSMWorkflowStatus
Import-SCManagementPack
Import-SCSMInstance
Import-SCSMManagementPack
New-SCADConnector
New-SCClassInstance
New-SCCMConnector
New-SCManagementGroupConnection
New-SCManagementPack
New-SCManagementPackBundle
New-SCOMAlertConnector
New-SCOMConfigurationItemConnector
New-SCOrchestratorConnector
New-SCRelationshipInstance
New-SCRunAsAccount
New-SCSMADConnector
New-SCSMAlertRule
New-SCSMAnnouncement
New-SCSMClassInstance
New-SCSMCMConnector
New-SCSMDCMWorkflow
New-SCSMEmailTemplate
New-SCSMManagementGroupConnection
New-SCSMManagementPack
New-SCSMManagementPackBundle
New-SCSMOMAlertConnector
New-SCSMOMConfigurationItemConnector
New-SCSMPortalDeploymentProcess
New-SCSMRunAsAccount
New-SCSMSubscription
New-SCSMUserRole
New-SCSMWorkflow
New-SCVMMConnector
Protect-SCManagementPack
Protect-SCSMManagementPack
Remove-SCClassInstance
Remove-SCManagementGroupConnection
Remove-SCManagementPack
Remove-SCRelationshipInstance
Remove-SCRunAsAccount
Remove-SCSMAllowListClass
Remove-SCSMAnnouncement
Remove-SCSMClassInstance
Remove-SCSMConnector
Remove-SCSMDCMWorkflow
Remove-SCSMEmailTemplate
Remove-SCSMManagementGroupConnection
Remove-SCSMManagementPack
Remove-SCSMPortalDeploymentProcess
Remove-SCSMRelationshipInstance
Remove-SCSMRunAsAccount
Remove-SCSMSubscription
Remove-SCSMUserRole
Remove-SCSMWorkflow
Reset-SCSMAllowList
Restore-SCSMDeletedItem
Set-SCManagementGroupConnection
Set-SCSMChannel
Set-SCSMManagementGroupConnection
Set-SCSMPortalCMConfiguration
Set-SCSMPortalContactConfiguration
Start-SCSMConnector
Test-SCManagementPack
Test-SCSMManagementPack
Update-SCClassInstance
Update-SCRunAsAccount
Update-SCSMAnnouncement
Update-SCSMClassInstance
Update-SCSMConnector
Update-SCSMDCMWorkflow
Update-SCSMEmailTemplate
Update-SCSMPortalDeploymentProcess
Update-SCSMPortalSoftwarePackage
Update-SCSMRunAsAccount
Update-SCSMSetting
Update-SCSMSubscription
Update-SCSMUserRole
Update-SCSMWorkflow

I know the list is long, and maybe it really wasn’t necessary to list them all in this post – but I wanted to show you how many 122 CMDlets actually is.

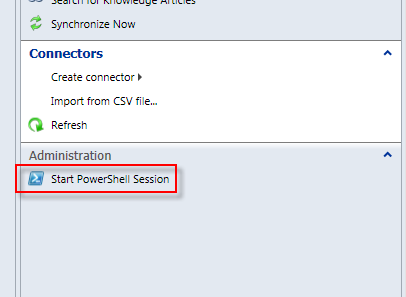
Microsoft also added a task to launch a powershell session from the Service Manager console. This makes it even easier to use powershell to do certain things and it feels like they encourage us to use it aswell.

Is there a use for all this CMDlets? I don’t know, but the risk of not having a CMDlets when you need it, has certainly decreased alot! I know for sure that I’m going to use some of these new CMDlets to script the configuration of freshly installed Service Manager environments.


SCSM2012 Beta – Two “minor” important news

October 28, 2011 Posted by Anders Asp

There’s two “minor” news that’s actually pretty important.

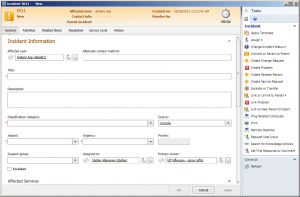
First – The ability to search for users using their usernames in the User Pickers! A simple thing that all my customers has asked for. The userpickers also displays the selected users username in the field.

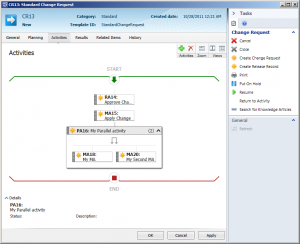
Second – Parallel activities in Change. At first when Microsoft stated that they would introduce parallel activities to Service Manager, the plan was actually to do so for Service Request and Release Management only! But after discussing this with the community and customers, Microsoft realised that they had to implement this in the Change Request process as well. As if that wasn’t enough, the Change Request form was updated with the new, good looking and drag n’ drop interface for activities!


There’s plenty of more SCSM 2012 blogposts to come – stay tuned! 🙂


Installing SCSM 2012 Beta

October 28, 2011 Posted by Anders Asp

I hope that you’re as excited about the release of the public beta as I’m, and I wanted to write this blogpost to help you get started with it. If you haven’t downloaded it yet, please see my previous post for a link to the download page.

Let’s start by taking a looking at the Software Requirements for SCSM2012 beta and compare them to SCSM2010:

Server role SCSM 2010 SP1 SCSM 2012 Beta
Management server
  • Windows Server 2008 x64 – or higher
  • .Net 3.5 framework with SP1
  • Microsoft Report Viewer Redistributable
  • Windows Server 2008 R2 SP1 x64
  • .Net 3.5 framework with SP1
  • Microsoft Report Viewer Redistributable
  • ADO.NET Data Services Update for .NET Framework 3.5 SP1
  • Powershell 2.0
Data Warehouse server
  • Windows Server 2008 x64 – or higher
  • .Net 3.5 framework with SP1
  • Windows Server 2008 R2 SP1 x64
  • .Net 3.5 framework with SP1
  • Powershell 2.0
Database server(s)
  • SQL Server 2008 SP1 x64 – or higher
  • .Net 3.5 framework with SP1 (if hosting DW dbs)
  • SQL Server 2008 SP1 x64 – or higher
  • .Net 3.5 framework with SP1 (if hosting DW dbs)
Service Manager console
  • Windows XP SP3
  • Windows Vista (Ultimate/Enterprise)
  • Windows 7(Professional/Ultimate)
  • .Net 3.5 framework with SP1
  • Microsoft Report Viewer Redistributable
  • Windows Vista SP2 (Ultimate/Enterprise)
  • Windows 7(Professional/Ultimate)
  • .Net 3.5 framework with SP1
  • Powershell 1.0/2.0
  • ADO.NET Data Services Update for .NET Framework 3.5 SP1
  • Microsoft Analysis Management Objects (AMOs)
  • Microsoft Report Viewer Redistributable
Portals
  • Windows Server 2008 x64 – or higher
  • IIS 7 with IIS 6 metabase compatibility
  • ASP.NET 2.0
  • Windows Server 2008 R2 x64
  • IIS 7 with IIS 6 metabase compatibility
  • ASP.NET 2.0
  • .NET Framework 4
  • SharePoint 2010
For more info regarding the requirements, please take a look at TechNet
SCSM 2010 SP1 reqs:
http://technet.microsoft.com/en-us/library/ff460997.aspx
SCSM 2012 Beta reqs:
http://technet.microsoft.com/en-us/library/hh519608.aspx


As you can see the list has changed from 2010 to 2012, and the most significant changes is marked in red.

You are now required to have Windows Server 2008 R2 Sp1 on your management, data warehouse and portal servers. This means that if you have a current installation of SCSM2010 on another OS (which would be a non R2 version), you will not be able to upgrade to SCSM 2012 the day it is released. Another important thing to note is that you won’t be able to install the SCSM 2012 client on a Windows XP machine. (Okey, we’re in a beta, so all this could change, but i highly doubt it…)

As the Self-service Portal is completly re-done, it will now require SharePoint 2010 (and all clients that connects to the portal requires Silverlight 4.0 – which only works in IE).

Allright, so in my scenario I have a freshly installed Windows Server 2008 R2 Sp1 x64 which will act as my SCSM 2012 management server. The databases will be placed on a separate SQL server. All required accounts has been pre-created and given the correct permissions.
(Take a look at this link for required accounts and permissions: http://technet.microsoft.com/en-us/library/hh519599.aspx)

  1. When running the setup I will be prompted that .NET framework 3.5 SP1 is required. It allows me to press Ok to download and install it, so let’s do that…
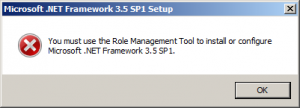
    Even though this looks all good, it will result in an error message and a failed installation. But don’t worry – the error message is actually helpful (for once).
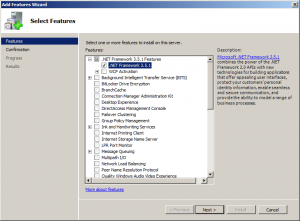
  2. Press OK to close the error message and close the little setup windows. Now open Server Manager – go to Features and press the Add Features button. Expand the .NET Framework 3.5.1 Features and check .NET Framework 3.5.1. Then hit Next followed by Install.
  3. When that’s done we can start the setup again. Once the setup wizard is loaded, we’ll chose to install a Service Manager management server.
  4. On the next page we’ll check the “Install as an evaluation edition” and that we’ve “Read and understood the license terms” (and remember to read everything!! ;P )
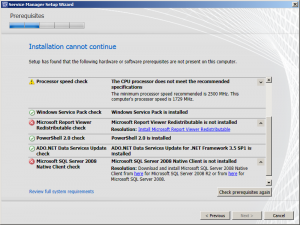
  5. Next, the wizard will check if you fulfill all the requirements to be able to install SCSM 2012. I do not…
  6. The report viewer redist. can be installed from the wizard, so start by doing that. The “Microsoft SQL Server 2008 Native Client” and the “Microsoft SQL Server 2008 Analysis Management Objects” cannot however. The wizard does provide us with link to where we can get it though. So go to those links, download and install these. Please note that these download pages is a bit messy with loads of different downloads. Be careful to read what you are actually downloading!
  7. After you’ve installed the mising requirements, you are actually forced to restart the setup. Clicking the “Check prerequsities again” doesn’t work on the “Microsoft SQL Server 2008 Analysis Management Objects”. This time when you get to this page, you should be able to continue though.
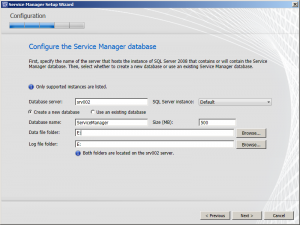
  8. On the next page we’ll have to specify where the database should be hosted. There’s nothing special to this page, just enter the information asked for and hit Next.
  9. Here you’re supposed to enter a management group name and an admin group. Just make sure to use a unique management group name here and if you haven’t created the necessary groups and accounts in AD – now is the time to do so 🙂
  10. The next two pages requires you to enter the service account credentials and the workflow account credentials. Then you’re basicly done.
  11. When you’ve pressed the install button, the actually installation will begin and we’ll be able to follow the installation process. If something goes wrong revise the installation log for more information. I’ll gladly help you troubleshoot failed installations – just post a comment in this blogpost and we’ll sort it out 🙂
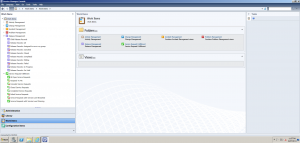
  12. And we’re finished! We can now start exploring SCSM 2012!
    We would need to install the rest of the server roles to get full functionallity, but the installation process hasn’t really been touch and it’s not like it’s rocket science to get through these wizards. The portal installation which requires SharePoint 2010 might cause some headache though, so I might do an installation blog-post on that later on.


SCSM 2012 Public Beta is here!

October 27, 2011 Posted by Anders Asp

No, this isn’t a typo. The public beta of System Center Service Manager 2012 is finally here!

This means that we now can discuss and blog about all the new exiciting features, improvements and fixes that are included in this version. My guess is that we will see loads of new blogposts on various SCSM blogs all over the internet now, including www.scsm.se of course! 🙂

Download link:
http://www.microsoft.com/download/en/details.aspx?id=27844&utm_source=feedburner&utm_medium=twitter&utm_campaign=Feed%3a+MicrosoftDownloadCenter+$Microsoft+Download+Center$

Edit – TechNet is also updated with the SCSM 2012 documentations, take a look here:
http://technet.microsoft.com/en-us/library/hh305220.aspx

A smarter way to notify the assignee when the affected user updates his incident

September 16, 2011 Posted by Anders Asp

A common request is to be able to notify the assigned analyst of an incident whenever the incident has been updated by the affected user. And for those who’s been reading my blog for a while know that I’ve described ways to do this before:

Notify the assigned analyst when a customer has updated his incident (Exchange connector)
http://www.scsm.se/?p=167

Minor SSP modifications, part 4 – Changing status of an incident when updated by the End user
http://www.scsm.se/?p=501

Both of those two blogposts is built around changing the status of the incident to be able to trigger a notification to the assigned user of the incident to react upon. There is nothing wrong with that, it works pretty good in fact, but there is one flaw in this design. This flaw is related to the way the Exchange connector works and the fact that we are applying a template to the incident to set the status back to active (for those of you who doesn’t know what I’m talking about, please see http://www.scsm.se/?p=167).

What if someone replies to an e-mail of an incident which has been closed? Well, based upon the configuration we did in the earlier blogpost mentioned above, the exchange connector will apply a template that sets the status back to active and the incident is re-opened. For some this might be acceptable, but for others, it’s not. I visited a customer a couple of days ago who thought this was great if the status of the incident was set to Resolved but not if it was Closed. Instead, they wanted to notify the end user that he or she would have to open a new incident and leave the old incident closed. There is no way to tell the Exchange connector to apply different templates depending on the current status of an incident, so I had to figure out another way to solve it.

Since I couldn’t use the status of an incident to trigger the notifications, I figured we would have to add a new propery to work with instead.

So here’s a smarter way to solve all this:

1. Extend the Incident class with a new boolean property. I will call my property “UpdatedByEndUser”.
(I won’t describe how to do this, but take a look at this blogpost if you need some help http://www.scsm.se/?p=192)

2. Create two incident templates – One who sets “UpdatedByEndUser” to True, and another who sets “UpdatedByEndUser” to False.

This is actually trickier than it sounds (but it’s not hard). The Extension tab is not accessible on the form when creating a template – so what you would need to do is checking the Escalated checkbox for both these templates, then export the management pack in which these templates are stored and change Escalated to UpdatedByEndUser. For the corresponding template, you will also have to change the value from True to False. Take a look at the screenshot below:
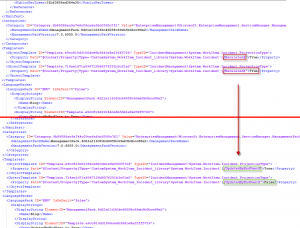
3. Edit the Exchange connector to apply the UpdatedByEndUser to True template when an incident is updated.

4. Edit the source code of the Self Service Portal to set this value to True if someones uses the portal to add a comment to their incident.

Open the source code for your SSP (http://www.scsm.se/?p=398). Then open the “Helper.cs” under WebParts and search for “//If it is resolved then reactivate it by changing the status to Active… ” – this should bring you to line 510.

Add this code…

 requestDataItem["UpdatedByEndUser"] = true; 

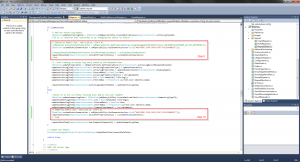
…to line 523 and line 535. Like this:
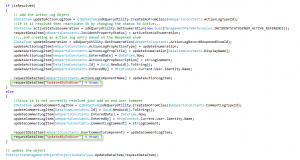
Note: This is the untouched code. If you followed the blogpost “Minor SSP modifications, part 4 – Changing status of an incident when updated by the End user” the code should like a little bit different and you might want to revert that change.

5. Create a two new workflows:
5a. One that triggers when UpdatedByEndUser changed from False to True and where the current status of the Incident is set to Active or Pending
5b. One that triggers when UpdatedByEndUser changed from False to True and where the current status of the Incident is set to Closed

Both these workflows would then send an e-mail to the assigned user to inform he/she that the incident has been updated, but they must also apply an template that sets the value of UpdatedByEndUser back to False; otherwise the workflows won’t trigger on recurring updates.

6. You might also want to set UpdatedByEndUser to true when the end user closes the incident from the portal (as requested in this thread http://social.technet.microsoft.com/Forums/en-US/administration/thread/83e3e998-cdde-4b4e-a83d-b17c08485531/)

To do this, open up your Source Code for the SSP again. The Close Request button is actually available on two pages: ViewAllRequests and RequestDetails, but both of these buttons uses a function called “CloseIncidentInternal”, so what we need to do is edit that particular function. This function is located in the Helper.cs file, so let’s open that file.

The function itself start at line 411 (just search for CloseIncidentInternal to get there) but we need to add the following peice of code to line 489:

incidentDataItem["UpdatedByEndUser"] = true;
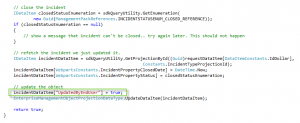
Compile and deploy the new binaries.

7. Create another workflow that triggers when UpdatedByEndUser changes from False to True and where the status equals closed. Use this workflow to notify the assigned analyst that the end user has closed his/hers incident.

All done 🙂
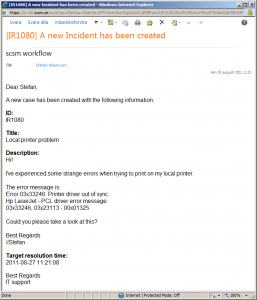
How do I retain the formatting of the description field in a notification template?

August 25, 2011 Posted by Anders Asp

I’ve seen this question far too many times now, it’s time to write a blogpost about it.

The short answer is <pre>, the long is described below. 🙂
If you need more information on Notification templates in general, take a look at Travis post:
http://blogs.technet.com/b/servicemanager/archive/2009/09/28/creating-notification-templates-in-system-center-service-manager.aspx

Problem description

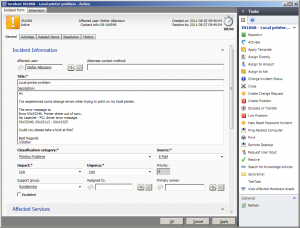
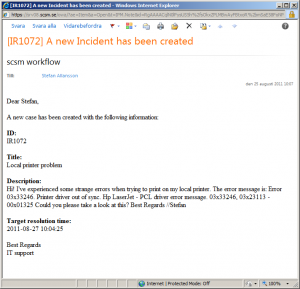
Take a look at this incident:

As you can see it has a description that spans over several lines.

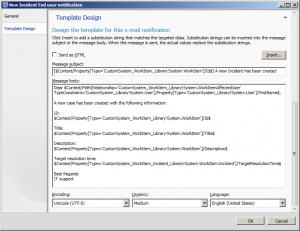
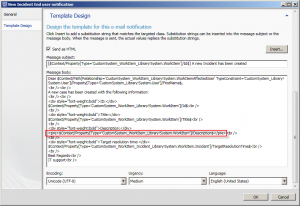
If we would like to send a notification to our end user upon the creation of the incident using the notification template below…

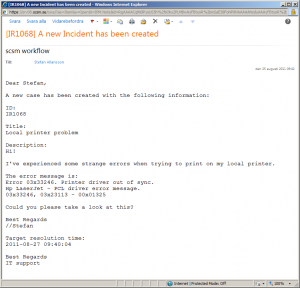
… that e-mail would look like this:

Allright, that works, but it’s a bit hard to read and looks a little boring, don’t you think?

Let’s add some formatting to our template, and as you might know, that is done by applying HTML to the notification template.

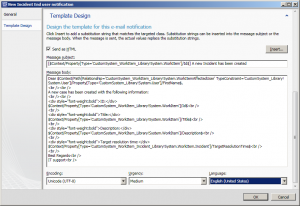
This is basically the same notification template, but with bold headlines:

But take a look at the e-mail now:

What happend to the formatting of the description field? Well since we are sending the e-mail in HTML now the formatting is stripped; cause a line break should be written as <br /> and not with the enter key on the keyboard.

Solution

The solution to this is rather simple and reads <pre>.

<pre> is an HTML tag and the definition of it is:

“The <pre> tag defines preformatted text. Text in a pre element is displayed in a fixed-width font (usually Courier), and it preserves both spaces and line breaks.”
(Source: http://www.w3schools.com/tags/tag_pre.asp)

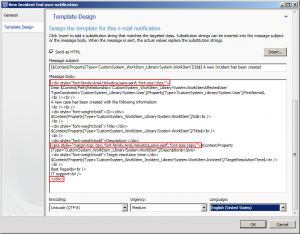
So lets edit our notification template and add the pre tag:

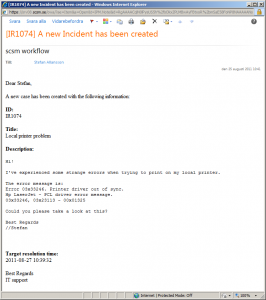
And now lets take a look at the e-mail:

The line-breaks (and all extra spaces if we had any) are retained, great!
If you want to change the formatting in any other way, you could always add some inline CSS to the <pre> tag, like this:

And that would result in an e-mail that looks like this:


Minor SSP modifications, part 4 – Changing status of an incident when updated by the End user

June 12, 2011 Posted by Anders Asp

Part 1 – Preperations: http://www.scsm.se/?p=398
Part 2 – Changing the default urgency of an incident: http://www.scsm.se/?p=421
Part 3 – Changing the preferred contact information behaviour: http://www.scsm.se/?p=459

Disclaimer: I’m not a developer and this is all new to me as well. All code is provided “as is” and I do not give any warranties or take any responsible for any errors that might occur.

One of the new features that the “new” portal provided, was the ability to let end users updated their incidents. That is a really nice feature but wouldn’t it be good to notify the assigned analyst that the end user has updated the incident? To achieve that, we are going to modify the SSP so that when an end user updates his or hers incident, we are changing the status of the incident to “Updated by Affected user”. In that way we could create a regular workflow inside Service Manager to notify the assigned analyst.

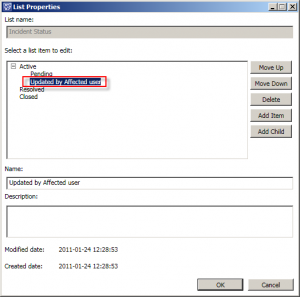
  1. To start with, open the Service Manager console and go to Library –> Lists. Locate the Incident Status list and open it.
  2. Mark Active and press Add child. Give the new list item a name, such as “Updated by Affected user”, then press Ok.
  3. Now we need to find out the enumeration value for this list item. To do so, we’re going to export the Management Pack in which it is stored. Go to Administration –> Management Packs and locate the “Service Manager Incident Management Configuration Library” management pack. Export this management pack.
  4. Open the “Service Manager Incident Management Configuration Library” which you just exported and search for whatever you named your new status. In my case “Updated by Affected user”. This should take you to the bottom of the file, to the language section and to something that looks like this:
            <DisplayString ElementID="Enum.b0a54eb92f6a4ee7a2016e3fc154b204">
              <Name>Updated by Affected user</Name>
            </DisplayString>
    

    Copy the ElementID (Enum.b0a54eb92f6a4ee7a2016e3fc154b204), we are going to use it in an SQL query soon.

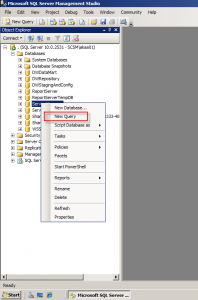
  5. Go the SQL server where the Service Manager database is stored, open the SQL Server Management Studio, locate the Service Manager database, right click it and select New Query.Run this query, and be sure to replace <ENUM> with the enumeration value we copied in step 4 (in my case “Enum.b0a54eb92f6a4ee7a2016e3fc154b204”).
    SELECT EnumTypeId, EnumTypeName
    FROM dbo.EnumType
    WHERE EnumTypeName = '<ENUM>'
    

    One line should be returned when running the query. Copy the EnumTypeId that is returned (in my case 401F45DE-1745-5AFB-9767-F412FB48835E).

  6. Start Visual Studio and load your SSP project.
  7. Locate and open the Webparts/Request/RequestDetails.cs and search for “Update Request”. Our fourth search should bring you to line 652 and to the code that looks like this:
    // Update request button
    HtmlTableCell r1c1 = Utils.GetTableCell(Constants.grayText, null, 30);
    this.updateRequestButton = new Button();
    this.updateRequestButton.ID = WebpartsConstants.UpdateIncidentButtonId;
    this.updateRequestButton.CommandName = "updateIncident";
    this.updateRequestButton.CommandArgument = "updateIncident";
    this.updateRequestButton.Command += new CommandEventHandler(updateRequestButton_Command);
    this.updateRequestButton.Text = WebPartsResources.UpdateRequestButton;
    this.updateRequestButton.Width = Unit.Pixel(135);
    r1c1.Controls.Add(this.updateRequestButton);
    

    This is where the Update Request button is added to the page. Line 7 (line 568 in VS) is the one that we are interested in, cause that is what is happening when someone presses the button. Click on updateRequestButton_Command to place your marker there, then press F12 to bring you to the definition of updateRequestButton_Command.

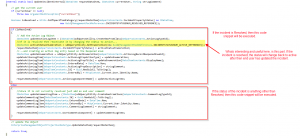
  8. This will take you to line 997 in VS and to the code that looks like this (please read the comments in the picture):So click on UpdateIncidentInternal to place your marker then, then press F12 to go to the definition.
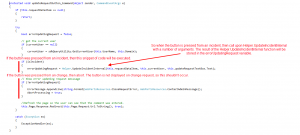
  9. This will bring you to the Helper.cs file and to the code that looks like this (please read the comments in the picture):So the first step is pretty easy. We would just have to replace the ManagementPackReferences.INCIDENTSTATUSENUM_ACTIVE_REFERENCE) with the GUID we got from the SQL query we ran in Step 5. I chosed to do it a little fancier though:
    if (isResolved)
    {
        // Add the Action Log Object
        IDataItem updateActionLogItem = (IDataItem)sdkQueryUtility.CreateEmoFromClass(WebpartsConstants.ActionLogTypeId);
        //If it is resolved then reactivate it by changing the status to Active...
    
        // Edited by Anders Asp - www.scsm.se. (Part 4)
        //IDataItem activeStatusEnumeration = sdkQueryUtility.GetEnumeration(new Guid(ManagementPackReferences.INCIDENTSTATUSENUM_ACTIVE_REFERENCE));
        IDataItem customStatusEnumeration = sdkQueryUtility.GetEnumeration(new Guid("401F45DE-1745-5AFB-9767-F412FB48835E"));
                   
        //requestDataItem[WebpartsConstants.IncidentPropertyStatus] = activeStatusEnumeration;
        requestDataItem[WebpartsConstants.IncidentPropertyStatus] = customStatusEnumeration;
        //End
    
        //...and creating an action log entry based on the Reopened enum
        IDataItem updateEnumeration = sdkQueryUtility.GetEnumeration(WebpartsConstants.ActionLogRecordReopenedEnumId);
        updateActionLogItem[WebpartsConstants.ActionLogPropActionType] = updateEnumeration;
        updateActionLogItem[WebpartsConstants.ActionLogPropTitle] = updateEnumeration[DataItemConstants.DisplayName];
        updateActionLogItem[WebpartsConstants.EnteredDate] = DateTime.Now;
        updateActionLogItem[WebpartsConstants.ActionLogPropDescription] = strLogComment;
        updateActionLogItem[DataItemConstants.Id] = Guid.NewGuid().ToString();
        updateActionLogItem[WebpartsConstants.EnteredBy] = HttpContext.Current.User.Identity.Name;
    
        requestDataItem[WebpartsConstants.ActionLogComponentName] = updateActionLogItem;
    }
    

    If we would build and deploy this to the SSP now, all resolved incidents that our end users comments, would get the status “Updated by Affected user”. But we want to make this happen on all types of incidents, regarding their previous status.

  10. To do this, we will have to add the two lines of code from above, to the second part of the if statement. Like this:
    //Since it is not currently resolved just add an end user comment
    IDataItem updateCommentLogItem = (IDataItem)sdkQueryUtility.CreateEmoFromClass(WebpartsConstants.CommentLogTypeId);
    updateCommentLogItem[DataItemConstants.Id] = Guid.NewGuid().ToString();
    updateCommentLogItem[WebpartsConstants.EnteredDate] = DateTime.Now;
    updateCommentLogItem[WebpartsConstants.EnteredBy] = HttpContext.Current.User.Identity.Name;
    updateCommentLogItem[WebpartsConstants.CommentLogComment] = strLogComment;
    // Added by Anders Asp - www.scsm.se. (Part 4)
    IDataItem customStatusEnumeration = sdkQueryUtility.GetEnumeration(new Guid("401F45DE-1745-5AFB-9767-F412FB48835E"));
    requestDataItem[WebpartsConstants.IncidentPropertyStatus] = customStatusEnumeration;
    // End
    

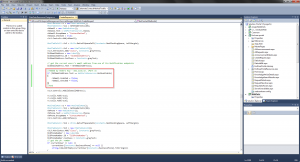
    And here’s a picture how it looks in Visual Studio:

  11. And with that change, we are all done. Build and copy the modified DLL files to the SSP server. As soon as someone updates an incident from the Self-service Portal, the status of that incident will change to “Updated by Affected user”.

If you would like assigned analyst to get notified when the end user has updated an incident, you should be able to do so with a regular workflow within Service Manager. Just use the critera
Incident status changed from NOT EQUAL “Updated by Affected user”
Incident status changed to EQUAL “Updated by Affected user”

You should also consider applying a template that changes the incident status back to Active when this workflow is triggered, otherwise you might miss notifications if an end user does comment the incident several times.

Minor SSP modifications, part 3 – Changing the preferred contact information behaviour

June 9, 2011 Posted by Anders Asp

Part 1 – Preperations: http://www.scsm.se/?p=398
Part 2 – Changing the default urgency of an incident: http://www.scsm.se/?p=421

Disclaimer: I’m not a developer and this is all new to me as well. All code is provided “as is” and I do not give any warranties or take any responsible for any errors that might occur.

 –

It’s almost exactly a month since my last post, and the reason for that is that I once again became a father of a little girl 🙂
But let’s put that aside for a moment, and let’s go on customizing the Self-service Portal.

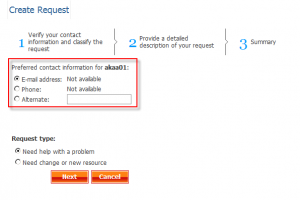
Today we’re going to focus on the behaviour of the “Preferred contact information” step when creating a new Incident or Change Request. By default, it looks like this:

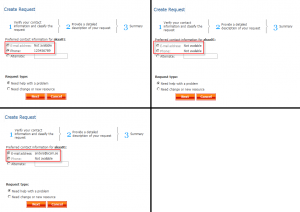
And as you can see, even though Service Manager doesn’t have any information stored regarding my e-mail address or phone number, I can still chose to be contacted that way. The worst part is that even though the information is unavailable, it is still selected by default. We don’t want any end-user to register a new IR/CR if we don’t have any means in contacting them.

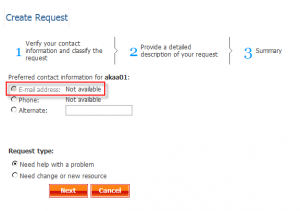
We are going to change the behaviour of this control, so if the information regarding the end-users e-mail address or phone number is unavailable, we will disable that radio button.

  1. Fire up Visual Studio and load your project.
  2. Open the CreateRequest.cs file that is located in WebParts/Request. This is the file in which almost all logic regarding the create request wizard is stored.
  3. So how are we going to find the correct lines of code to edit in this huge file? Let’s try searching for “contact” and see if we can find anything interesting…

    Our first hit should be the definition of a TextBox named alternateContactMethod. Doesn’t that sounds familiar? 🙂

    private TextBox alternateContactMethodTextBox;

    So let’s search again, but this time search for “alternateContactMethodTextBox”. This search will take you to a snippet of code that looks like this:

    HtmlTableCell r3c3 = new HtmlTableCell();
    r3c3.Attributes.Add("class", Constants.grayText);
    alternateContactMethodTextBox = new TextBox();
    alternateContactMethodTextBox.ID = "txtBoxAlternate";
    alternateContactMethodTextBox.CssClass = Constants.grayText;
    r3c3.Controls.Add(alternateContactMethodTextBox);

    And this is where the Alternate contact method textbox is added to the page. If you scroll a bit upwards, you should see a couple of comments saying something about Getting phone and Getting e-mail address. Great! We’ve found the place in the code where the preferred contact information is defined. (Line 1472 in Visual studio)

  4. So let’s take a look at the e-mail part:
    HtmlTableRow r1 = new HtmlTableRow();
    HtmlTableCell r1c1 = GetHeaderCell(20);
    rbEmail = new RadioButton();
    rbEmail.Text = WebPartsResources.Email;
    rbEmail.GroupName = "ContactMethod";
    rbEmail.Checked = true;
    r1c1.Controls.Add(rbEmail);
    
    HtmlTableCell r1c2 = Utils.GetLeftSpaceCell(Constants.NonBlockingSpace, LeftMargin);
    
    HtmlTableCell r1c3 = new HtmlTableCell();
    r1c3.Attributes.Add("class", Constants.grayText);
    lblEmailAddress = new Label();
    lblEmailAddress.ID = "lblEmailAddress";
    lblEmailAddress.CssClass = Constants.grayText;
    
    // get the current users's email address from one of its Notification endpoints
    lblEmailAddress.Text = GetEmailAddress();
    
    r1c3.Controls.Add(lblEmailAddress);
    

    Let’s take a closer look at some lines of the code:
    Line 3-6 is the definition of the radiobutton for the e-mail contact method. On line 6 this method is defined as checked = true, which means that this is the default value.
    Line 7 is the line of code that adds this control to the page itself.
    Line 13-15 is the lines of code where the label for the e-mail address is defined.
    Line 18. The text of the label itself is retrived from a function called GetEmailAddress.
    Line 20. The label is added to the page.With this knowledge, we are able to figure out that if the function GetEmailAddress on line 18 is returning “Not available” we should change the properties of rbEmail which is the radio button.

  5. Time to do some coding 🙂

    We need to add an if statement to check the value of lblEmailAddress, and if that value equals “Not available” we want to disable the radio button. Enter the following code on line 1504 in Visual Studio:

    if (lblEmailAddress.Text == WebPartsResources.NotAvailable)
    {
        rbEmail.Enabled = false;
        rbEmail.Checked = false;
    }
    

    So if we would build this and deploy it to the SSP, it would now look like this:That’s a great start, isn’t it? 🙂

    Just a couple of notes regarding the code we added before continuing:
    Instead of comparing lblEmailAddress.Text to the string “Not available”, I chosed to compare it to WebPartsResources.NotAvailable. The reason for that is if we are running the portal in a different language, or if someone decides that we want to use another verbiage instead, our code wouldn’t work. If we use WebPartsResources.NotAvailable we don’t have to worry for those things.

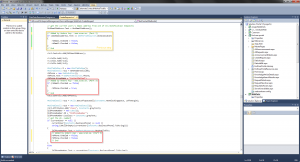
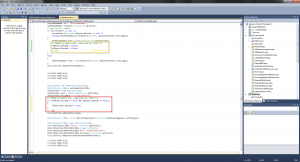
    Here’s how it looks in Visual Studio:

  6. Let’s go on and do the same with phone. First add this code to line 1523 in Visual Studio:
    if (rbEmail.Checked == false)
    {
        rbPhone.Checked = true;
    }
    

    This code will check the radio button for Phone if we unchecked rbEmail.

    Then go to line 1545 and add this code:

    rbPhone.Enabled = false;
    rbPhone.Checked = false;
    

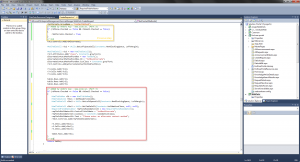
    This is how it should look in Visual Studio now:
    If we would build and deploy this to the SSP, it would now look like this:Go to line 1566 and add this code:

    if (rbPhone.Checked == false && rbEmail.Checked == false)
    {
        rbAlternate.Checked = true;
    }
    

    This is the code that will set the Alternate radio button to checked, if the other radio buttons is unchecked.

    
  7. As a final step we want to make sure that if our end-users doesn’t have an available e-mail address or phone number, they are forced to enter something in the alternate contact method textbox. To do so, enter the following code on line 1591:
    if (rbPhone.Checked == false && rbEmail.Checked == false)
    {
        HtmlTableRow r3b = new HtmlTableRow();
        HtmlTableCell r3bc1 = GetHeaderCell(20);
        HtmlTableCell r3bc2 = Utils.GetLeftSpaceCell(Constants.NonBlockingSpace, LeftMargin);
    
        HtmlTableCell r3bc3 = Utils.GetTableCell(Constants.ValidationClass, null, null);
        RequiredFieldValidator reqFieldValidatorAlt = new RequiredFieldValidator();
        reqFieldValidatorAlt.ControlToValidate = "txtBoxAlternate";
        reqFieldValidatorAlt.CssClass = Constants.ValidationClass;
        reqFieldValidatorAlt.Text = "Please enter an alternate contact method";
        r3bc3.Controls.Add(reqFieldValidatorAlt);    r3.Cells.Add(r3bc1);
        r3.Cells.Add(r3bc2);
        r3.Cells.Add(r3bc3);
                   
        table.Rows.Add(r3b);
    }


    So where did I get this code? Well, I knew there was a similar function for the title field on the next step of the wizard, so I did some searches in the source code for that and found these lines of code. Then I just modified some of them to fit the alternate textbox instead.

    Here’s how it looks like in Visual Studio:


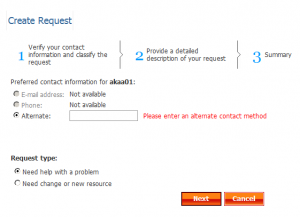
    When an end-user tries to go on to the next step without entering an alternate contact method, they will get a warning like this:

    So now when we’ve done that we should be finished for now. Build your solution and copy the DLL files to the SSP server and try it out. (See part 2 of the series for more details on how to do this)

Any comments regarding this post is highly appriciated! 🙂

Note: The function of validating that something has been entered into the Alternate text box will only work if the user doesn’t have any E-mail address or Phone available. What we really want, is that as soon as someone checks the radio button for alternate (or clicks in the textbox), we want to enable this validation. I’ll try to figure out how to solve this post an update if I do. Tips on how to trigger a postback is appriciated!