MMS 2011

March 10, 2011 Posted by Anders Asp

Hello!

I know it’s been a while since we posted now, but both me and Stefan is out on the field helping customers implementing SCSM atm. However, I just wanted to inform you all that Stefan and I is going to MMS 2011 in Las Vegas in a couple of days! Five days packed with great sessions and loads of SCSM!

Are you going to attend aswell? Post a comment! 🙂

Creating recurring Change Requests

February 11, 2011 Posted by Anders Asp

There was a question on the official forum on how one would be able to create recurring Change Requests (http://social.technet.microsoft.com/Forums/en-US/systemcenterservicemanager/thread/3f9f08ce-c331-43cf-b22c-2fe43da1440d/). So I figured that it might be a good idea to create a blog post on how to achive this.

In this blogpost, we are going to use the authoring tool to create a new custom workflow that runs a powershell script to create a new change request (with a template) on a pre-defined schedule.

To be able to do what’s decribed in this post, you will need to download and “install” the latest version of SmLets: http://smlets.codeplex.com/

Step 1 – Create a Change Request template

  1. Start your SCSM console and go to Library -> Templates.
  2. Click Create template in the task pane.
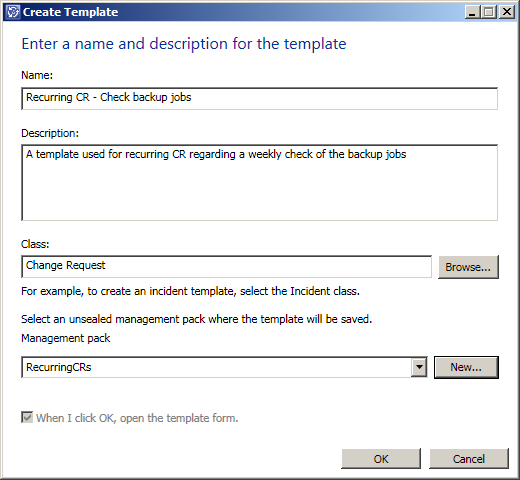
  3. Enter a name, description and choose to target the Change Request class. We’ll also have to decide where we want to save this template. I’ll chose to create a new MP to save the whole solution/blogpost within.
  4. When pressing Ok the template will be displayed in design mode. Enter the appropiate information and remember to add atleast one activity.
  5. Oki, so now when the template is finished, we need to export the MP in which it was stored. To do this, go to Administration -> Management Packs and locate the MP. Mark it and then click Export in the task pane.

Step 2 – Create the workflow

  1. Start the Authoring Tool and open the MP we just exported from SCSM and in which our template is stored.
  2. In the Management Pack Explorer, right click Workflows and select Create.
  3. Enter a good name and description.
  4. At the next page of the wizard, we’ll have to enter a workflow run condition. The defualt value “Run at scheduled time or at scheduled intervals” suits us perfectly.
  5. Enter on what days of the week and at what time you want the workflow to run. Then click your way through the rest of the wizard.
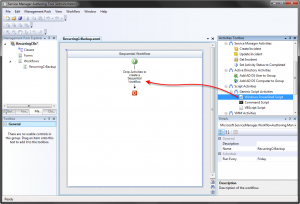
  6. An empty workflow should now be displayed in the authoring tool. Let’s add a script activity to this workflow, so something happens when it’s triggered. Do this by dragging the Windows Powershell Script activity from the Activities Toolbox to the workflow.
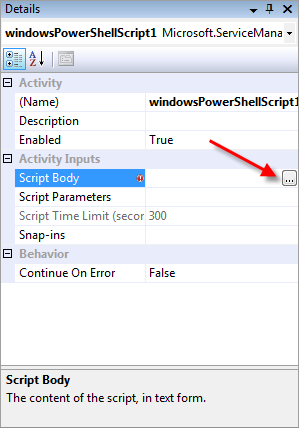
  7. Next we will have to define the properties of the Powershell activity. This is done by marking the activity and then locating the Script Body in the Details pane. When marking the Script Body, a “…” button will appear. Click that button.
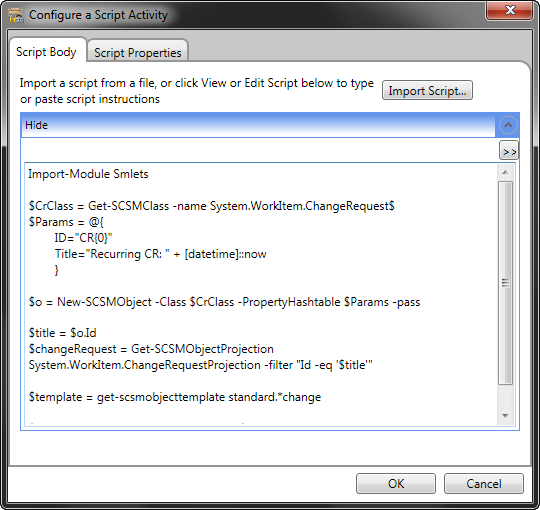
  8. A dialog box named Configure a Script Activity should appear and in that box there should be a line that says “View or Edit Script”. Click that line to show the field in which we can add our Powershell script.
  9. Copy this Powershell script and paste into the Script body of the activity.
  10. Import-Module Smlets
    
    $CrClass = Get-SCSMClass -name System.WorkItem.ChangeRequest$
    $Params = @{
    ID="CR{0}"
    Title="Recurring CR: " + [datetime]::now
    }
    
    $o = New-SCSMObject -Class $CrClass -PropertyHashtable $Params -pass
    
    $title = $o.Id
    $changeRequest = Get-SCSMObjectProjection System.WorkItem.ChangeRequestProjection -filter "Id -eq '$title'"
    
    $template = get-scsmobjecttemplate standard.*change
    
    $changeRequest.__base.ApplyTemplate($template)
    $changeRequest.__base.Commit()
    

    Like this:

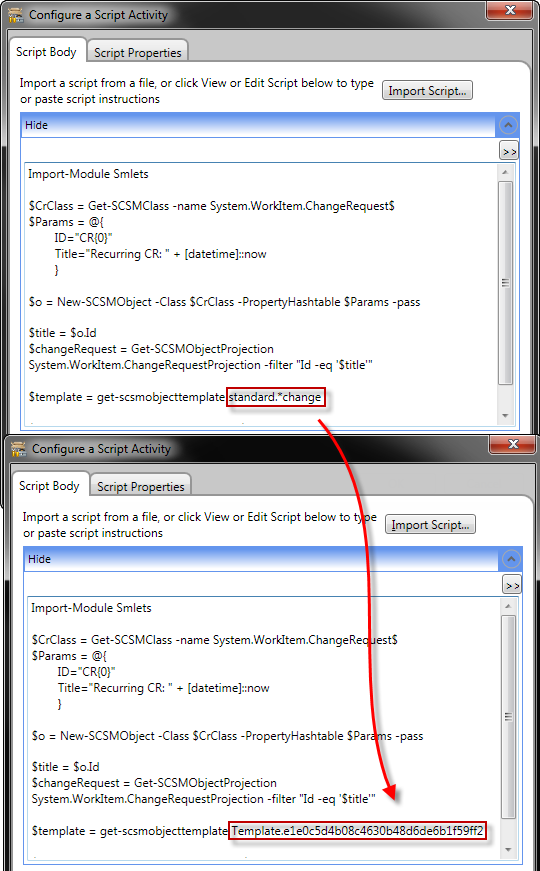
  11. Before we press Ok, there is (atleast) one thing we need to edit first, and that is the $template. In step 1 we created a template that we wanted to use in this workflow, and to be able to use that, we need to find out the ID of that template. In order to do that, we need to open the MP/XML file in which it is stored.Locate your MP and open it with an XML editor (notepad should be fine). Now do a search for the name of your template, until you find a display string for it. In that display string, an ElementID should be defined. Copy that ID (without the ” ” characters).
  12. Now, replace the ‘standard.*change’ text in your powershell script with this ID, like this:
  13. Press Ok to close the dialog box and then hit the Save All button in the authoring tool.
  14. Along with our updated MP, the authoring tool should now have created a couple of files. One of them should be a DLL file which needs to be copied to the installation directory of SCSM (by default: C:\Program Files\Microsoft System Center\Service Manager 2010). After you’ve copied the DLL into place, open the SCSM console and import the MP (Administration -> Management Packs).

Now a CR should be created every time your schedule starts the workflow!

Thanks to Jim Truher who helped me with the Powershell syntax for applying a template!

Export all unsealed management packs

February 8, 2011 Posted by Anders Asp

Here’s a little powershell script that I use for exporting all unsealed MPs. It’s really useful to run once in a while so you have a backup of all unsealed MPs.

The script will create a new folder with the current date and store all MPs in that folder. Change the $OutPutDir variable to a folder of your choice.

Add-PSSnapin SMCMDLetSnapIn

$OutPutDir = "C:\Unsealed MPs\"

$UnsealedMPs = Get-SCSMManagementPack | ?{ ! $_.Sealed }

$CurrentDate = Get-Date
$CurrentDate = $CurrentDate.ToShortDateString()
$CompletePath = ($OutPutDir + $CurrentDate)

if ( ! (test-path  $CompletePath))
{
    $output = New-Item -Type Directory -Name $CurrentDate -Path $OutPutDir
}

$UnsealedMPs | %{
    "   Exporting: {0}" -f $_.Name 
    $_ | Export-SCSMManagementPack -directory "$CompletePath"
    }

Cumulative Update 1 for SCSM SP1 just released

February 3, 2011 Posted by Anders Asp

The Cumulative Update 1 for Service Manager Sp1 were just released and contains the following fixes:

  • Extending a large-volume class hangs the console indefinitely
  • Adding 25th child item on a list results in an error
  • DW data loss for relationship fact tables with properties

Download it here:
http://www.microsoft.com/downloads/en/details.aspx?FamilyID=82954fe2-2168-42cd-8456-762730ac37eb&utm_source=feedburner&utm_medium=twitter&utm_campaign=Feed%3A+MicrosoftDownloadCenter+%28Microsoft+Download+Center%29#tm

I’ll install it as soon as possible and report any issues with it here.

Update: The installation went smoothly and no issues were discovered. The installation should only be performed on the Mgmt. and DW server.
Read more here: http://support.microsoft.com/?kbid=2484853

Extend the Software Item class with licensing information

February 3, 2011 Posted by Anders Asp

Some customer wants to keep track on how certain software are licensed, and one way to do that will be described here.

We will extend the Software item class with a list property, populate that list with some values and create a view based upon that licensing information.

  1. Start your Authoring tool and create a new Management Pack (MP). I’ll name my MP ExtensionOfSoftwareItem.xml
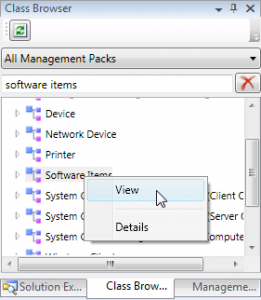
  2. Locate the Class Browser and search for Software Items (If the list is empty, hit the refresh/reload content button first). Right click the Software Items class and choose View.
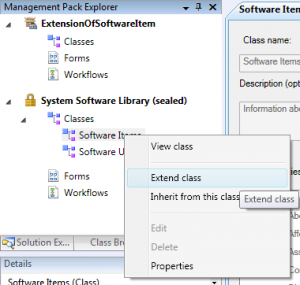
  3. The sealed MP in which the original Software items class is stored will be loaded in the authoring tool. Next we will have to right click the Software Items class and select Extend class.
  4. A dialogue asking in which MP we want to store our customizations will appear. Press Ok to save it in the MP we just created.
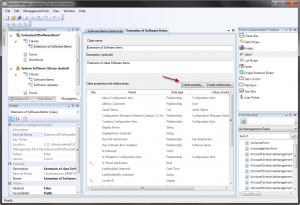
  5. Now we have came to the step where we do the actual extension, so let’s hit the Create Property button.
  6. Enter a good name for our new property and press Create. I’ll name mine SoftwareLicense.
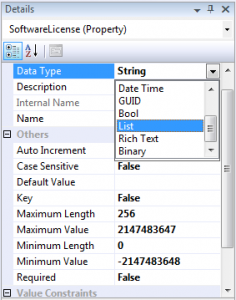
  7. The new property which we just added will be of the default Data Type string. What we would like to do, is creating a list of different licensing models, and in order to do that, we need to change the Data Type to List. So press the dropdown meny labeled Data Type in the Details window and select list. (You might need to press the enter key after you’ve selected List)
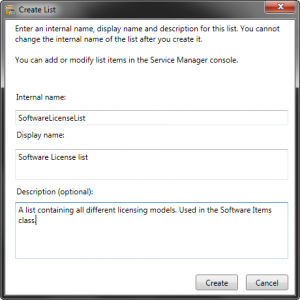
  8. A new dialogue box will appear in which all existing lists will be presented. But since our list doesn’t exist, we need to create a new one. So press the Create List… button.
  9. Enter a Internal name, a display name and a description and press Create followed by Ok.
  10. That’s actually all we need to do in the Authoring Tool. If the Software items class would have it’s own form, we could have edited that form to place our new list where we wanted it, but since it’s based upon the generic form, we won’t need to do that. So let’s save our MP and import it into Service Manager. (To import the MP, go to Administration -> Management Packs in the SCSM console and use the import task on your right hand side)
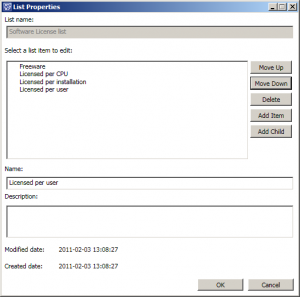
  11. After the MP has been imported, our new list should appear under Library -> Lists. So let’s go there and add a few licensing models.
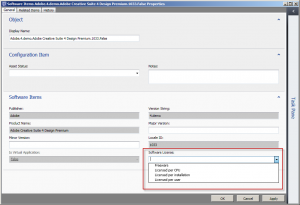
  12. Now let’s go to the All Software view in the Configuration Items wunderbar. Locate a software CI of your choice and open it. The form should now have additional field named Software License.
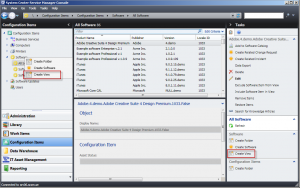
  13. So you are now able to assign a software license form for all your applications, great. But if you would like to see all your Software Items in a fast and easy way, we would need to create a view for that. So let’s do that as well.Right click on the folder on your left hand side named Software and select Create view, or click the task on your right hand side that is named the same.
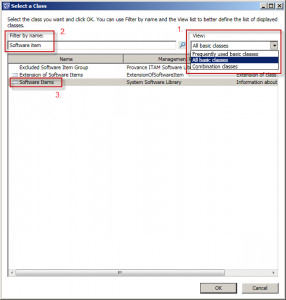
  14. Give the view an appropriate name and scroll down to the Criteria section. The default class here will be Configuration Item, so let’s change that to Software Items instead. Do that by pressing the Browse button. In this dialogue box, we will have to change the view to “All basic classes” first. Then we can do a search for Software Items. When you have located Software Items class, mark it and press ok.
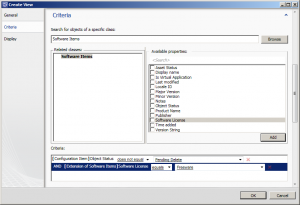
  15. Now we can select the criteria for this view. Leave the Object status does not equal Pending delete as it is, but mark Software Licens in the list and press Add. A new row should appear in the Criteria box below. Let’s edit that so it says Software License Equals Freeware.
  16. The last and final step of creating the view, is to select which information the view should display. In this example I’ll just choose Display Name, Software license and Time added. After you’ve selected which columns to display, press Ok.
  17. Your new view should now be created and should only view the Software items in which we have spcified the Software license as Freeware.

To sum up: We extended the Software Items class in the Autoring Tool with a property of the type list. We then added some items to this list and created a view based on on of those values. This is a pretty common task for anyone working with Service Manager, and with the help of the Authoring tool it is an easy thing to do.

Notify the assigned analyst when a customer has updated his incident (Exchange connector)

February 1, 2011 Posted by Anders Asp


******* Update ********

Please take a look at this post as well.
http://www.scsm.se/?p=564
***********************

Often when a incident is created with the Exchange Connector, it lacks some vital information that the customer forgot to write in his/her’s email. The analysts will therefore use the Send email task that was provided together with the Exchange Connector to request more information. And because of the lack of information, the analyst can’t start working with the incident. Therefore it’s important to notify the analyst when the customer has updated the incident with the required information so he/she can start working with it as soon as possible.

Note: This blogpost assumes that you have installed and configured the Exchange connector and the Send Email task. For more information regarding this, see the official blogpost:
http://blogs.technet.com/b/servicemanager/archive/2011/01/13/exchange-connector-released.aspx

To do this, we will create a workflow that will trigger on the incident status, and send an email to the assigned analyst once it changes from one value to another.

  1. To start with, we need to create some incident templates. One of these will be applied when the analysts use the Send Email task, and the other will be used once the incident is updated by the Exchange Connector.
    Navigate to Library -> Templates in the SCSM console.
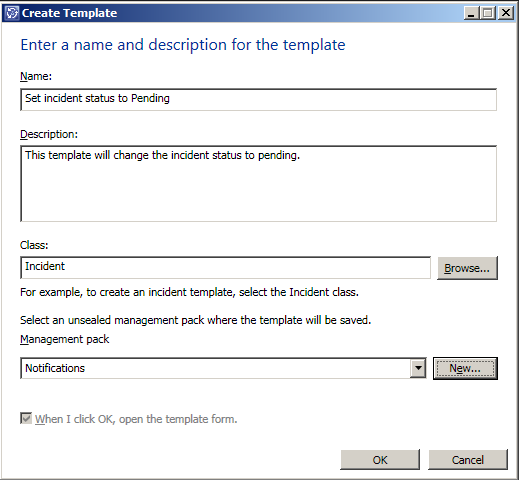
  2. Click the Create template task and enter the information needed. When you press Ok the template form will be displayed.
    Create template
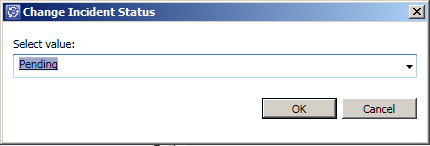
  3. The only thing we want to configure in this template, is the incident status. This can be done by using the task “Change Incident Status” and choosing a incident status. In this post I will be using the status Pending. However, it might be a good idea to use a custom status if you have other workflows tied to Pending.  If you want to use a custom status, you can add that to the Incident Status list (Library -> Lists -> Incident Status).
    Change Incident Status task Set status to Pending
  4. Now, repeat step 2 and 3 again, but this time create a template that sets the status to Active.Note: If you have a template that you use when the Exchange Connector updates a incident and you want to maintain that information, you will have to edit that template to also set the status to Active.
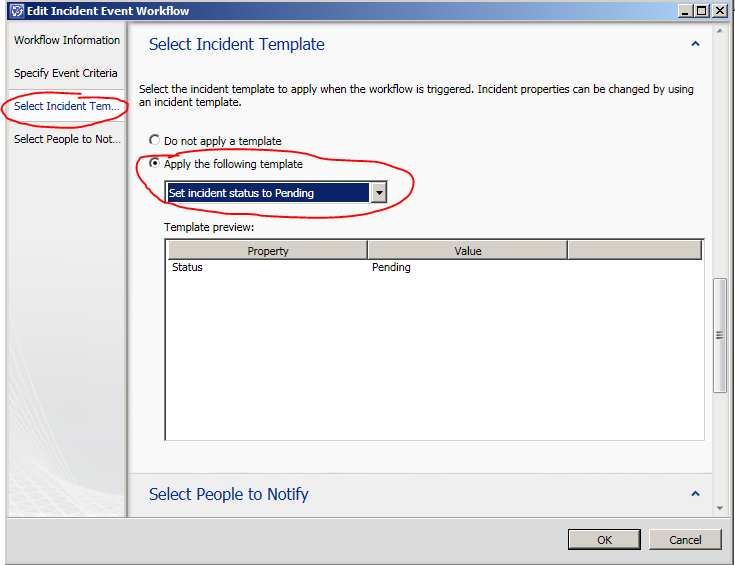
  5. We should now have two templates to use when the different workflows are triggered. The next step will be to edit all your workflows related to the Send Email task that does require input from the customer to apply the “Set incident status to Pending” template when being triggered. (For instance, you might have a Send Email template to inform your customer. On those workflows, this template should not be applied.)
    To do this, go to Administration -> Workflows -> Configuration -> Incident Event Workflow configuration. Locate the workflows that needs to be edited and open them one at a time to edit. Then go to the Select Incident Template part of the form and choose to apply the template we created.
    Editing our workflow related to the Send Email task
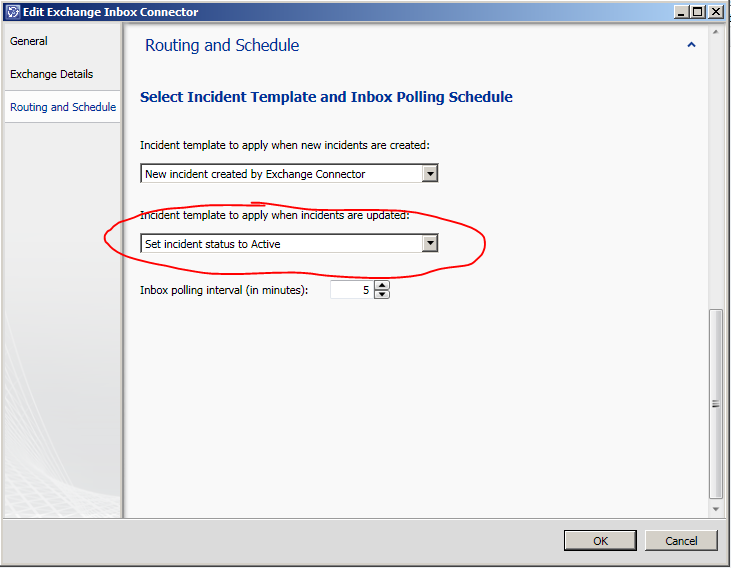
  6. So whenever we use a Send Email that is bound to this workflow, it will send the notification/request to the customer, but it will also update the status of the incident to Pending. Great! Next, we will have to go to our Exchange connector, and change the “Incident template to apply when incidents are updated” setting. Here we will be using our template that changes the status to Active. (Remember the note in step 4!)
    (Administration -> Connectors. Double click your Exchange connector to edit)
    Edit the Exchange Connector
  7. Now, go ahead and create a Notification template to use when the customer has updated the incident. (Administration -> Notifications -> Templates. Use the Create E-mail template task)
  8. The last thing we need to do now, is creating a workflow that will notify the assigned analyst whenever the incident status changes from Pending to Active. So let’s go back to our workflows and create a new workflow that does this. (Administration -> Workflows -> Configuration -> Incident Event Workflow configuration. Then press Add.)
    – Enter an appropriate name and description, trigger when the incident is updated and save it in a management pack of your choice.
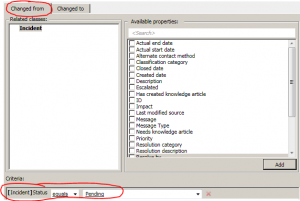
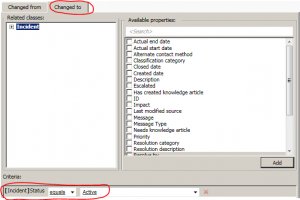
    – Set the Changed From criteria to Incident status Equals Pending and the Changed To criteria to Incident status Equals Active.
    – Skip the Apply template part (unless you would like to do that)
    – In the Select user to notify, select to notify the Assigned to user and the template of your choice. Remember to press Add 🙂
    – Complete the wizard by pressing Next followed by Finish and Close.
    Changed from criteriaChanged to criteria
  9. And we are Done! It might be a good idea to try some different scenarios together with a colleague to make sure it works as expect.

How to create a view that has two “AND” in criteria instead of “AND” and “OR”

January 28, 2011 Posted by Stefan Allansson

There is a default view called “All open incidents”, that shows all incidents except resolved and closed.
Maybe you want to create a new view that shows all incidents except resolved and closed and has a specific Support Group(in my case the Support Group is called IT-Support)

If you do that in the console, the criteria look like this:


Everything seems good so far, but when you open that view you will see all incidents, including resolved and closed incidents. So how do you solve this?
We have to do some changes in the XML file.
Right click your view and choose edit to see which management pack you have saved it into:


Export your management pack and open your XML file.

If you have more views in the same management pack, you can search in the file for a display name that matches your view.

<DisplayString ElementID=”View.a1ac40bb826b49d88485931b22022ece”>
          <Name>IT-Support Open Incidents</Name>

Do a new search in the XML file for the name that represents the “DisplayString ElementID”. In my case View.a1ac40bb826b49d88485931b22022ece, and you will find this:

<View ID=”View.a1ac40bb826b49d88485931b22022ece”

Scroll down a little bit more and you find <Criteria>where you have three values for the criteria you specified in your view.
The first criteria, in my case “Support Group” is under <Operator>Equal</Operator> and  the second, which is the status “Resolved” is under <Operator>NotEqual</Operator>.
Between those values there is <Expression>  and <Or>. Delete those two. After the last criteria you have </Or> and </Expression> which you also have to delete.


Save your XML file and import it again.
Restart your console before you open your view.
Now you will see all incidents except resolved and closed incidents.
If you look at your view in edit mode in the console it now looks like this:


And before we edited the XML it looked like this:

How to make the description field in Incident to grow with its content

January 24, 2011 Posted by Anders Asp

Okay, so this is a fairly common request. Quite often you enter more than three lines of text in the description field on an incident, and end up with something like this:

Out of the box behaviour

As you can see (and probably have noticed when working in the console) you’ll get a scrollbar. This make descriptions over several lines very hard to read.

What we want to achive with this blogpost, is to make the description field to grow with it’s content. So let’s get started!

  1. Start the Authoring Tool. For those of you who haven’t installed it yet, you can find the installation package here: http://www.microsoft.com/downloads/en/details.aspx?FamilyID=78dcb15b-8744-4a93-b3fa-6a7a40ffeaae
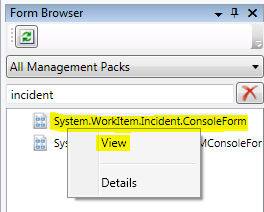
  2. Localize the Form Browser and find the form named System.WorkItem.Incident.ConsoleForm. Right click it and choose View. (If the form browser is empty, try hitting the refresh button once.)
  3. Form Browser

  4. The original Incident form will be loaded and displayed. To be able to customize the form, we need to press the Customize button in the orange header.
  5. A new dialogue box name Targeted Management Pack will be displayed. In this box you will have to specify where you want to save the changes we are about to make. If you haven’t customized the Incident form before, you should hit the New… button. However, if you have customized the form before, you are forced to save these changes within the same management pack (MP). Otherwise you won’t be able to import this  MP into SCSM as we can only have one customization MP per form.
  6. Give the new MP a suitable name, like IncidentFormCustomization, choose where to save it and press Save followed by Ok.
  7. We are now able to customize the form, and all changes will be saved in the MP we defined in the previous step.

    Note:
    Everything you do at this point, will be written to the MP, even if you change the same value several times. This means, that if you modifiy the same value four times, four “posts” will be added to the MP. My way of tackling this, is to just do the basic things within the authoring tool, and then adjust the settings in the MP itself (with an XML editor). We won’t do that in this post though.
  8. So what we would need to do at this point, is basicly changing the Height property for the description field to Auto. However (you knew it wasn’t going to be that easy, right?), there is some code behind the description field, that will cause this not work as expected. Take a look at the following screenshots:
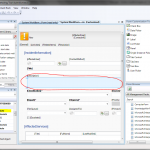
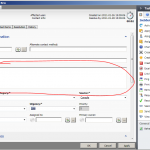
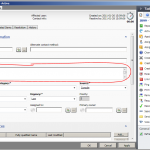
    Editing the height in the authoring tool Creating a new incident with our customized MP imported Looking at the same incident we just created

    Picture 1: Here is what I changed in the authoring tool
    Picture 2: The MP I created is imported into SCSM and this picture show the incident form when creating a new incident. Hey, it seems to work!
    Picture 3: After saving the incident and re-opening it, this is how it looks. The height of the description field is locked to a fixed value again…

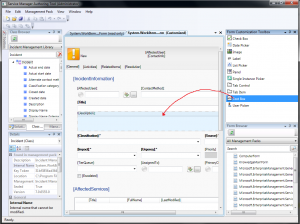
  9.  What we have to do instead, is hiding the original description field and adding our own. First, let’s add the new field by dragging a Text Box from the For Customization Toolbox into our form and release it ontop of our description field. This will cause our new textbox to be placed within the container of the original description field. Be sure that the description field and title is outlined with a grey dashed border, as shown in the picture below.
    How to add a textbox in the authoring tool
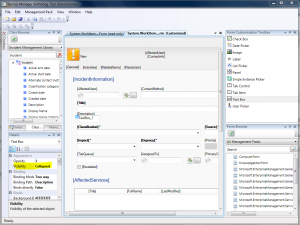
  10. Now, click on the original description field, and change the Visibility value from Visible to Collapsed in the Details panel.
    How to change the value to collapsed
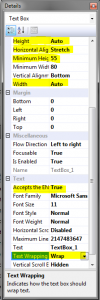
  11. Mark the textbox we added in step 8 by clicking on it, and change the following values: Height = Auto, Horizontional Alignment = Stretch, Minimum Height = 55, Width = Auto, Accepts the ENTER key = True, Text Wrapping = Wrap.
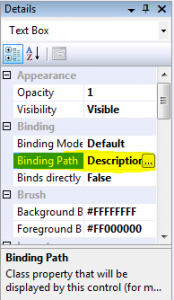
  12. Finally, we have to bind this field to the description property. This is done by clicking the … button on Binding Path and selecting Description.
  13. Our MP should now be done, so let’s save it and import it into SCSM (To import the MP in SCSM, go to Administration –> Management Packs. Then choose Import from the list of Tasks)
  14. Now go on and create a incident with a description that span over several lines. If everything was done correctly, the description field should grow whenever needed. You should also try to open the incident after saving it, to make sure the description field works when viewing it in this way.

After importing our new MP, this is how the description field should look like:

The result