Category: ‘Service Manager’

Issues when configuring SharePoint 2010

April 22, 2013 Posted by Anders Asp

(Even though this isn’t directly related to Service Manager nor System Center, I still think it is an appropriate post to have here since SharePoint 2010 is a requirement for the SSP in SCSM.)

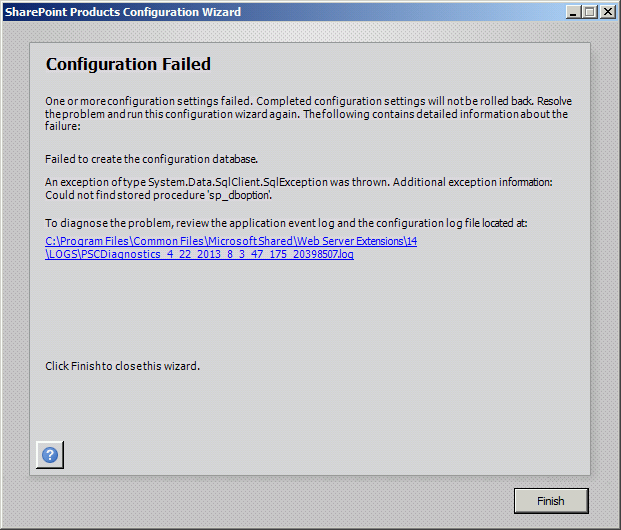
I’ve heard about this issue a couple of times but haven’t actually bumped into it myself until today. After installing SharePoint 2010 (Foundation i my case), you get an error saying “Configuration Failed. Failed to create the configuration database” when running the SharePoint Products Configuration Wizard to complete your installation.

ConfigurationFailed

The reason why you are getting this error, is because you are trying to configure SharePoint to run on a SQL server 2012. When SharePoint 2010 was created, there were no 2012 version of SQL so the wizard is a bit confused when trying to run the configuration. To resolve this, you need to download and install Service Pack 1 for SharePoint, then when you re-run the Configuration Wizard, everything should be fine.

Notification to Service Owner when creating a Problem

April 17, 2013 Posted by Alexander Axberg

Hi,

In this blogpost I describe how to set up a mail notification workflow, that will send mail to the Service Owner when you add that service as an “Affected Service” when creating a new Problem.

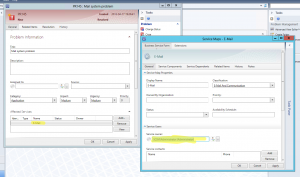
In this example you can see that I’ve added the service E-Mail, and that the user “Administrator” is the current Business Service owner, who will recieve the mail.

affected_service

The trick is to create the relationship to “Service Owner” manually in XML, since you can’t select it from the console. The relation between the problem ticket and the service is stored in “System.WorkItemAboutConfigItem”. The relationship looks like this:


<WorkflowArrayParameter Name="PrimaryUserRelationships" Type="string">
 <Item>$Context/Path[Relationship='CustomSystem_WorkItem_Library!System.WorkItemAboutConfigItem' TypeConstraint='System!System.Service']/Path[Relationship='System!System.ConfigItemOwnedByUser' TypeConstraint='System!System.User']$</Item>
</WorkflowArrayParameter>


Here is a complete Management Pack containing that workflow:


<ManagementPack ContentReadable="true" SchemaVersion="2.0" OriginalSchemaVersion="1.1" xmlns:xsd="http://www.w3.org/2001/XMLSchema" xmlns:xsl="http://www.w3.org/1999/XSL/Transform">
 <Manifest>
 <Identity>
 <ID>ManagementPack.77a399a63b514841aae0529b06df0070</ID>
 <Version>7.5.2905.0</Version>
 </Identity>
 <Name>Problem Created</Name>
 <References>
 <Reference Alias="EnterpriseManagement">
 <ID>Microsoft.EnterpriseManagement.ServiceManager.UI.Console</ID>
 <Version>7.5.2905.0</Version>
 <PublicKeyToken>31bf3856ad364e35</PublicKeyToken>
 </Reference>
 <Reference Alias="CustomSystem_WorkItem_Library">
 <ID>System.WorkItem.Library</ID>
 <Version>7.5.2905.0</Version>
 <PublicKeyToken>31bf3856ad364e35</PublicKeyToken>
 </Reference>
 <Reference Alias="CustomSystem_Library">
 <ID>System.Library</ID>
 <Version>7.5.8501.0</Version>
 <PublicKeyToken>31bf3856ad364e35</PublicKeyToken>
 </Reference>
 <Reference Alias="EnterpriseManagement1">
 <ID>Microsoft.EnterpriseManagement.ServiceManager.UI.Administration</ID>
 <Version>7.5.2905.0</Version>
 <PublicKeyToken>31bf3856ad364e35</PublicKeyToken>
 </Reference>
 <Reference Alias="SystemCenter">
 <ID>Microsoft.SystemCenter.Library</ID>
 <Version>7.0.8432.0</Version>
 <PublicKeyToken>31bf3856ad364e35</PublicKeyToken>
 </Reference>
 <Reference Alias="SystemCenter1">
 <ID>Microsoft.SystemCenter.Subscriptions</ID>
 <Version>7.5.2905.0</Version>
 <PublicKeyToken>31bf3856ad364e35</PublicKeyToken>
 </Reference>
 </References>
 </Manifest>
 <Categories>
 <Category ID="Category.030336f5653f4e028b222b9bbe70bfd0" Value="EnterpriseManagement!Microsoft.EnterpriseManagement.ServiceManager.ManagementPack">
 <ManagementPackName>ManagementPack.77a399a63b514841aae0529b06df0070</ManagementPackName>
 <ManagementPackVersion>7.5.2905.0</ManagementPackVersion>
 </Category>
 <Category ID="Category.cdf0a383046642f6a47f1755c1e2978d" Target="NotificationSubscription_9fa9d9b3_80fd_4538_a82b_2a181deb61ee" Value="EnterpriseManagement1!Microsoft.EnterpriseManagement.ServiceManager.Rules.WorkflowSubscriptions" />
 </Categories>
 <Monitoring>
 <Rules>
 <Rule ID="NotificationSubscription_9fa9d9b3_80fd_4538_a82b_2a181deb61ee" Enabled="true" Target="SystemCenter!Microsoft.SystemCenter.SubscriptionWorkflowTarget" ConfirmDelivery="true" Remotable="true" Priority="Normal" DiscardLevel="100">
 <Category>System</Category>
 <DataSources>
 <DataSource ID="DS" TypeID="SystemCenter1!Microsoft.SystemCenter.CmdbInstanceSubscription.DataSourceModule">
 <Subscription>
 <InstanceSubscription Type="422afc88-5eff-f4c5-f8f6-e01038cde67f">
 <AddInstance />
 </InstanceSubscription>
 <PollingIntervalInSeconds>60</PollingIntervalInSeconds>
 <BatchSize>100</BatchSize>
 </Subscription>
 </DataSource>
 </DataSources>
 <WriteActions>
 <WriteAction ID="WA" TypeID="SystemCenter1!Microsoft.EnterpriseManagement.SystemCenter.Subscription.WindowsWorkflowTaskWriteAction">
 <Subscription>
 <VisibleWorkflowStatusUi>true</VisibleWorkflowStatusUi>
 <EnableBatchProcessing>true</EnableBatchProcessing>
 <WindowsWorkflowConfiguration>
 <AssemblyName>Microsoft.EnterpriseManagement.Notifications.Workflows</AssemblyName>
 <WorkflowTypeName>Microsoft.EnterpriseManagement.Notifications.Workflows.SendNotificationsActivity</WorkflowTypeName>
 <WorkflowParameters>
 <WorkflowParameter Name="SubscriptionId" Type="guid">$MPElement$</WorkflowParameter>
 <WorkflowArrayParameter Name="DataItems" Type="string">
 <Item>$Data/.$</Item>
 </WorkflowArrayParameter>
 <WorkflowArrayParameter Name="InstanceIds" Type="string">
 <Item>$Data/BaseManagedEntityId$</Item>
 </WorkflowArrayParameter>
 <WorkflowArrayParameter Name="TemplateIds" Type="string">
 <Item>ee7a7670-9f96-70b3-68f2-44b8f153006e</Item>
 </WorkflowArrayParameter>
 <WorkflowArrayParameter Name="PrimaryUserRelationships" Type="string">
 <Item>$Context/Path[Relationship='CustomSystem_WorkItem_Library!System.WorkItemAboutConfigItem' TypeConstraint='System!System.Service']/Path[Relationship='System!System.ConfigItemOwnedByUser' TypeConstraint='System!System.User']$</Item>
 </WorkflowArrayParameter>
 </WorkflowParameters>
 <RetryExceptions />
 <RetryDelaySeconds>60</RetryDelaySeconds>
 <MaximumRunningTimeSeconds>7200</MaximumRunningTimeSeconds>
 </WindowsWorkflowConfiguration>
 </Subscription>
 </WriteAction>
 </WriteActions>
 </Rule>
 </Rules>
 </Monitoring>
 <LanguagePacks>
 <LanguagePack ID="ENU" IsDefault="false">
 <DisplayStrings>
 <DisplayString ElementID="ManagementPack.77a399a63b514841aae0529b06df0070">
 <Name>Problem Created</Name>
 </DisplayString>
 <DisplayString ElementID="NotificationSubscription_9fa9d9b3_80fd_4538_a82b_2a181deb61ee">
 <Name>Problem Created</Name>
 </DisplayString>
 </DisplayStrings>
 </LanguagePack>
 <LanguagePack ID="SVE" IsDefault="false">
 <DisplayStrings>
 <DisplayString ElementID="NotificationSubscription_9fa9d9b3_80fd_4538_a82b_2a181deb61ee">
 <Name>Problem Created</Name>
 </DisplayString>
 </DisplayStrings>
 </LanguagePack>
 </LanguagePacks>
 </ManagementPack>

MMS 2013

April 16, 2013 Posted by Anders Asp


Times flies when you are having fun – MMS is over for this year!

MMS2013For those of you waiting for an announcement of new versions or new products, I’m sorry to dissapoint you… Nothing new were announced or informed this year. But that doesn’t mean that MMS was bad, no, not at all! To be honest, I had a great time – meeting old and making new friends, attending to great sessions with great speakers, hosted a Birds of a Feather session with my authoring friends, recorded a MVA video together with Brad Bird (thanks for inviting me!) and last but not least, arranging the Friends of SCSM event.

Meeting old and making new friends

This is one of the best thing with MMS. To meet people in person and get a face on that person which name you’ve seen so many times on the forums, blogs, mail list or whatever. The networking oppertunities during MMS is without a doubt the best!

Great sessions with great speakers

As usual, MMS is packed with loads of great sessions! If you weren’t able to attend or if the session you wanted to see collided with each other, you can always take a look at the sessions now from your computer:
http://channel9.msdn.com/Events/MMS/2013

I just want to highlight two great sessions which i really encourage you to watch:

“Configuring Service Manager for Performance and Scale” with Nathan Lasnoski
http://channel9.msdn.com/Events/MMS/2013/SD-B312

“Best Practices For Runbook Authoring and Managing Orchestrator” with Pete Zerger and Anders Bengtsson
http://channel9.msdn.com/Events/MMS/2013/SD-B317

Birds of a Feather

You probably know that I co-authered the book called System Center 2012 Service Manager Cookbook with some System Center ninjas? Well, anyway, Steve Beaumont figured it would be nice to arrange a Birds of a Feather to cover things we weren’t able to cover in the book and answer questions that you might have had. Said and done – here’s all the authors on the stage hosting the BoF called “System Center 2012 Service Manager Cookbook – Desserts Chapter”.

IMG_6833

From left to right: Me, Dieter Gasser, Andreas Baumgarten, Sam Erskine, Steve Beaumont

Signing some books

Signing some books

Recorded a video for MVA

This was a really unexpected thing that my friend Brad Bird invited me to do. He had been invited to record a video on Service Manager Architecture and Connectors and asked me to join him – which I gladly did! Thanks for the invite Brad!

I have no idea how the video turned out yet – hopefully it is okey but I wish Brad and I would have gotten the time to rehearse it atleast once before recording it! 😛

Ongoing recording!

Ongoing recording!

Friends of SCSM

This is something that Andreas Baumgarten and I arranged for the first time last year, but since everyone seemed to like the concept of it, we arranged it this year as well. Basically, we invited a big group of Service Manager enthusiast and made sure there was a place where we all could gather to have some food and beer. How could food and beer together with great discussions regarding Service Manager and community projects be anything other than great success? 🙂

FriendsOfSCSM

Do you recognize any of the people in these pictures? 🙂

So to sum it all up – MMS 2013 was great and I really hope we’ll see MMS in Las Vegas next year as well!

Modify the timeformat in the Self-Service Portal

April 10, 2013 Posted by Alexander Axberg

If you need to update the format of how the timestamp in the portal is displayed (from 12-hour to 24-hour for example), go to the Portal with a Sharepoint-admin account.

date1

Go to the Site Actions-button in the top-left corner, select Site Settings.

Under Site Administration, click Regional settings. Adjust the format to the desired setting and click “Ok”.


Update Rollup 2 for SC 2012 SP1 released

April 9, 2013 Posted by Anders Asp

The Update Rollup 2 for System Center Service Pack 1 has just been released.

Here’s the patch notes for Service Manager.

Service Manager (KB2828618)

Issue 1
If the number of “Manual Activities” that are displayed in the Service Manager Portal exceeds a certain limit, page loads may time out and do not render correctly. This results in a blank page.

Issue 2
Incorrect cleanup of a custom related type causes grooming on the EntityChangeLog table to stall. This causes the table to grow significantly.

Issue 3
Service requests complete unexpectedly because of a race condition between workflows.

Issue 4
The console crashes when you double-click a parent incident link on an extended incident class.

Issue 5
PowerShell tasks that were created by using the authoring tool do not run because of an incorrect reference to certain assemblies.

Issue 6
The Exchange management pack is stuck in a Pending state after management pack synchronization.

So we have fixes for several bugs, where I’d say that Issue 3 is the one that caused me most pain.

I’ve not been able to test it yet and won’t be able to do so until I get back home from the MMS in Vegas, but if I find anything unexpected I’ll update this post.

Note that it doesn’t look like that the Exchange connector is included in the UR itself, so my guess is that we’ll see it as a separate download.

See this link for all details:
http://support.microsoft.com/kb/2802159

MVP renewal

April 1, 2013 Posted by Anders Asp

It’s a real honor to be renewed as a “System Center Cloud and Datacenter Management” MVP for 2013! This will be my second year as an MVP and I’m really looking forward for another year with the “CDM family”. It’s great to have a group of likeminded people to discuss and share your ideas and questions with!

Anders Asp MVP

Regards
//Anders Asp

FAQ: How do I change the display language in the SCSM Integration Pack for Orchestrator?

March 2, 2013 Posted by Anders Asp

Many people work with Service Manager in English, regardless their native language and are therfore used to the English terminology of the product. In SCSM 2012 you can easily configure this by going to the language menu and selecting English.

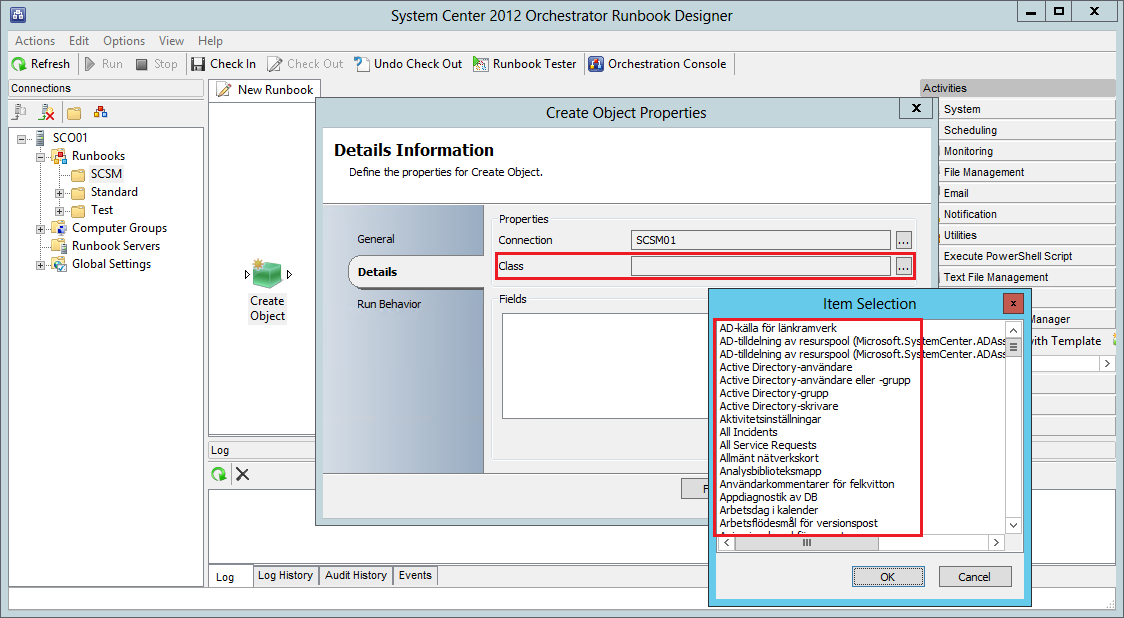
When using the Service Manager Integration Pack (IP) in Orchestrator on the other hand, there are no straight forward way to configure the language the IP runs under though. I mean, the actual IP is in English, but the data retreived from SCSM might not be in English. In this example below you can probably tell that classes is displayed in another language than English – it’s actually in Swedish!

SCSM_IP_Swedish

So why are the classes displayed in Swedish and not English?

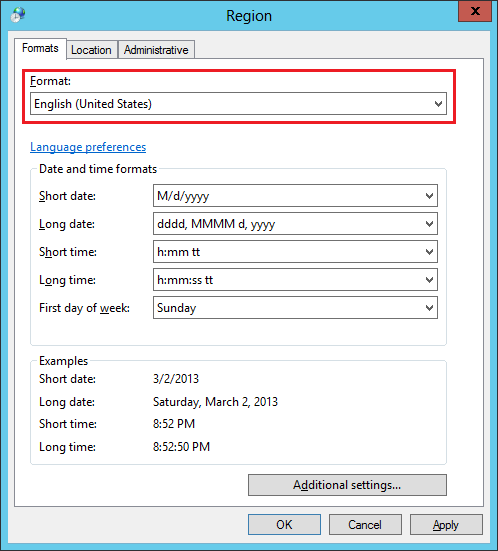
Well, it turns out that the data retreived is actually displayed in the same language as your selected Format. So if you want to make sure that the data retreived from Service Manager is displayed in English, you have to go to Control Panel –> Region and change the Format to English. And this is on the user account running the Runbook Designer, not the account used for the actual IP Connection.

Format

After you’ve made this change, restart the Runbook Designer and give it another try. The data retreived should now be in English.

SCSM_IP_English

… and yeah, changing the format affects plenty of other things as well. The format of the clock for instance…

Clock

Workflow mail notification for “Assigned To” field (Change, Incident, ServiceRequest, Problem, Release, Activities)

February 19, 2013 Posted by Alexander Axberg

Update Feb 26:

Found an error in the Workflow parameters for Change and Service Request, so the MP is now updated.

Update Jan 24:

Uploaded a new version with mail templates included, and Problem, Release and Activity workflows added.


/There are several blog posts out there about how to create a MP with a workflow that sends an E-Mail to the “Assigned To” -user when that field gets updated, but most of them have only been for Incidents or only for Service Requests.

I have gathered these workflows in one MP, so the mail workflow will trigger the same way for all processes. Mail templates are also included in the MP.

  • Incident
  • Change Request
  • Service Request
  • Problem
  • Release
  • Manual Activity
  • Review Activity

Before you import the MP, you might want to disable those notifications that you don’t want. The code in the MP looks like this:

<Rule ID="IncidentAssignmentChanges" Enabled="true">

With the parameter “Enabled” you can enable or disable each workflow.


Download MP: Lumagate.AssignedToNotification.xml


Impersonation for the Exchange Connector 3.0RC (Exchange 2007)

February 14, 2013 Posted by Alexander Axberg

In the documentation for the Exchange 3.0 RC connector, it describes how to configure Exchange to allow the workflow-account to use impersonation with two PowerShell commands.

However, due to a type-o in the documentation, the same command is written twice:

Add-ADPermission -Identity “<identity>” -User <domain>\<username> -extendedRight ms-Exch-EPI-May-Impersonate


The command that is missing is the one that enables the impersonation function on the Exchange CAS-server(s). So you first need to enable it on the serverobject, and then on the specific mailbox.

The two correct command that needs to be run are these:

User1= Workflow-account userid in SCSM

User2=Mailbox account

  • Get-ExchangeServer | where {$_.IsClientAccessServer -eq $TRUE} | ForEach-Object {Add-ADPermission -Identity $_.distinguishedname -User (Get-User -Identity User1 | select-object).identity -extendedRight ms-Exch-EPI-Impersonation}
  • Add-ADPermission -Identity “User2 Fullname” -User User1 -extendedRight ms-Exch-EPI-May-Impersonate

Replace self-signed certificate in the Self-Service Portal

February 1, 2013 Posted by Alexander Axberg

This post will describe how to replace a standard self-signed certificate in the SSP portal with a certificate from a trusted source and correct defined subjectname to get rid of the certificate warnings every time your end-users access the portal.

We don’t want them to see this do we?
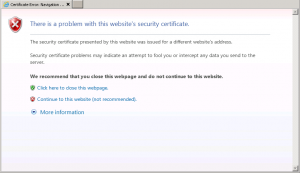
Certificate Warning

The first question you need to ask yourself is: What URL should my end-users use?

In this example we will use: https://portal.mycompany.com


The second question is: What computers will access the portal?

In most cases, the portal will only we available for internal use since it requires an AD-user to be logged on.

If it should be accessible from computers outside of the company network, you will need to buy a commercial certificate from an certificate provider that are trusted by most computers (VeriSign, DigiCert for example).

If your company has an internal Certification Authority-server and a PKI-infrastructure already in place, that would probably be the best solution to request a certificate from if only your Company computers will be accessing the portal.

(only the internal computers trust the Company CA-server)


When you are ready, you must begin with creating a certificate request. This request will contain all properties that the certificate will contain.

Open IIS Manager on the SSP server.


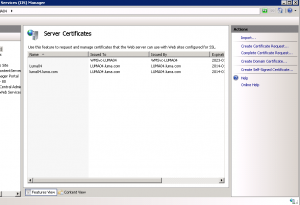
Select the servername in the left column, and then doubleclick Server Certificates in the right column.
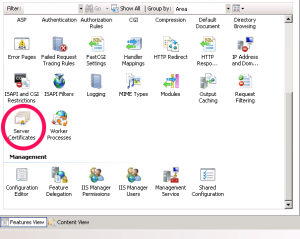
2


Click Create Certificate Request… The wizard starts.
Server Certificates


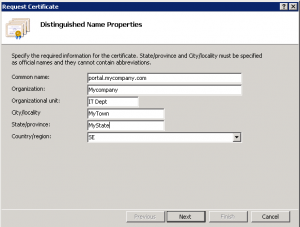
Enter your company information here. The important part is Common Name, as this will reflect the domainname in your URL. If you are planning on buying a commercial certificate, it’s important that the other fields here matches your companys registered information.
Cert details


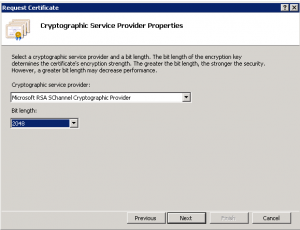
Change the bitlength to 2048 as this is the minimum accepted size many use today.
keysize


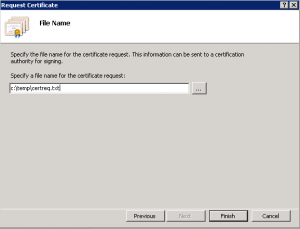
Select a location to save your certificate request to a file.
req file


You request is now saved to a file, and in the background a private key has been created on the server that will later be used in the certificate.

Now take that textfile to your certificate authority, they will use the content for producing a certificate. You will then receive a certificate with only a public key from you certificate authority. Take this file and copy it to the SSP server.

Now go back to your IIS Manger and click Complete Certificate Request…

Select the certificate file you recieved from you certificate authority and enter a friendly name. The friendly name is visible in the “Name” column in IIS Manager.

Click OK.
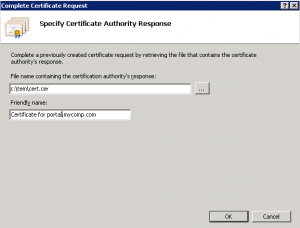
complete cert req

Now you might recieve an error message, however it’s a false alarm. If you refresh your IIS Manager you will see that the certificate has been added to the list.


Back in the IIS Manager, expand the Sites-container and select Service Manager Portal, and click Bindings.
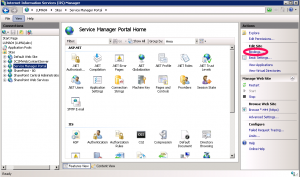
Bindings


Select the https binding and click edit.

Select the new certificate

Repeat this process the same way for the binding on the site called: SCSMWebContentServer


In IIS, double-click on Application Settings for the Service Manager Portal-site.
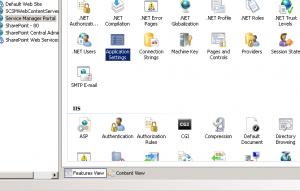
application_setting

Update the SMPortal_WebContentServer_URL value to reflect the URL in the new certificate.

Click OK, Close


Open the file: C:\inetpub\wwwroot\System Center Service Manager Portal\ContentHost\web.config, and edit the 3rd row from the bottom to reflect your new URL:

<add key=”ContentHostAbsoluteUri” value=”https://SERVER:443/ContentHost” />

Recycle the Application Pool in IIS Manager called: ContentHost_appPool to reload the edited web.config-file

This will prevent you from getting errors when opening Knowledge Articles on the portal.


..and you are all done!


Some extra information if you are curious on the certificate request process:

When the request file is created, at the same time a private key for that upcoming certificate is created. You can see it if you open up mmc.exe, add the Certificate snap-in(Computer Store) and look under the Certificate Enrollment Requests.
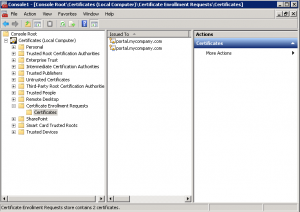
private key

Here is the private key that just been created. They will later be merged together with the public key in the .cer file you recieved when you run the “Complete Certificate Request” process.

Windows stores all it’s private keys for computerbased certificates at: C:\Users\All Users\Microsoft\Crypto\RSA\MachineKeys